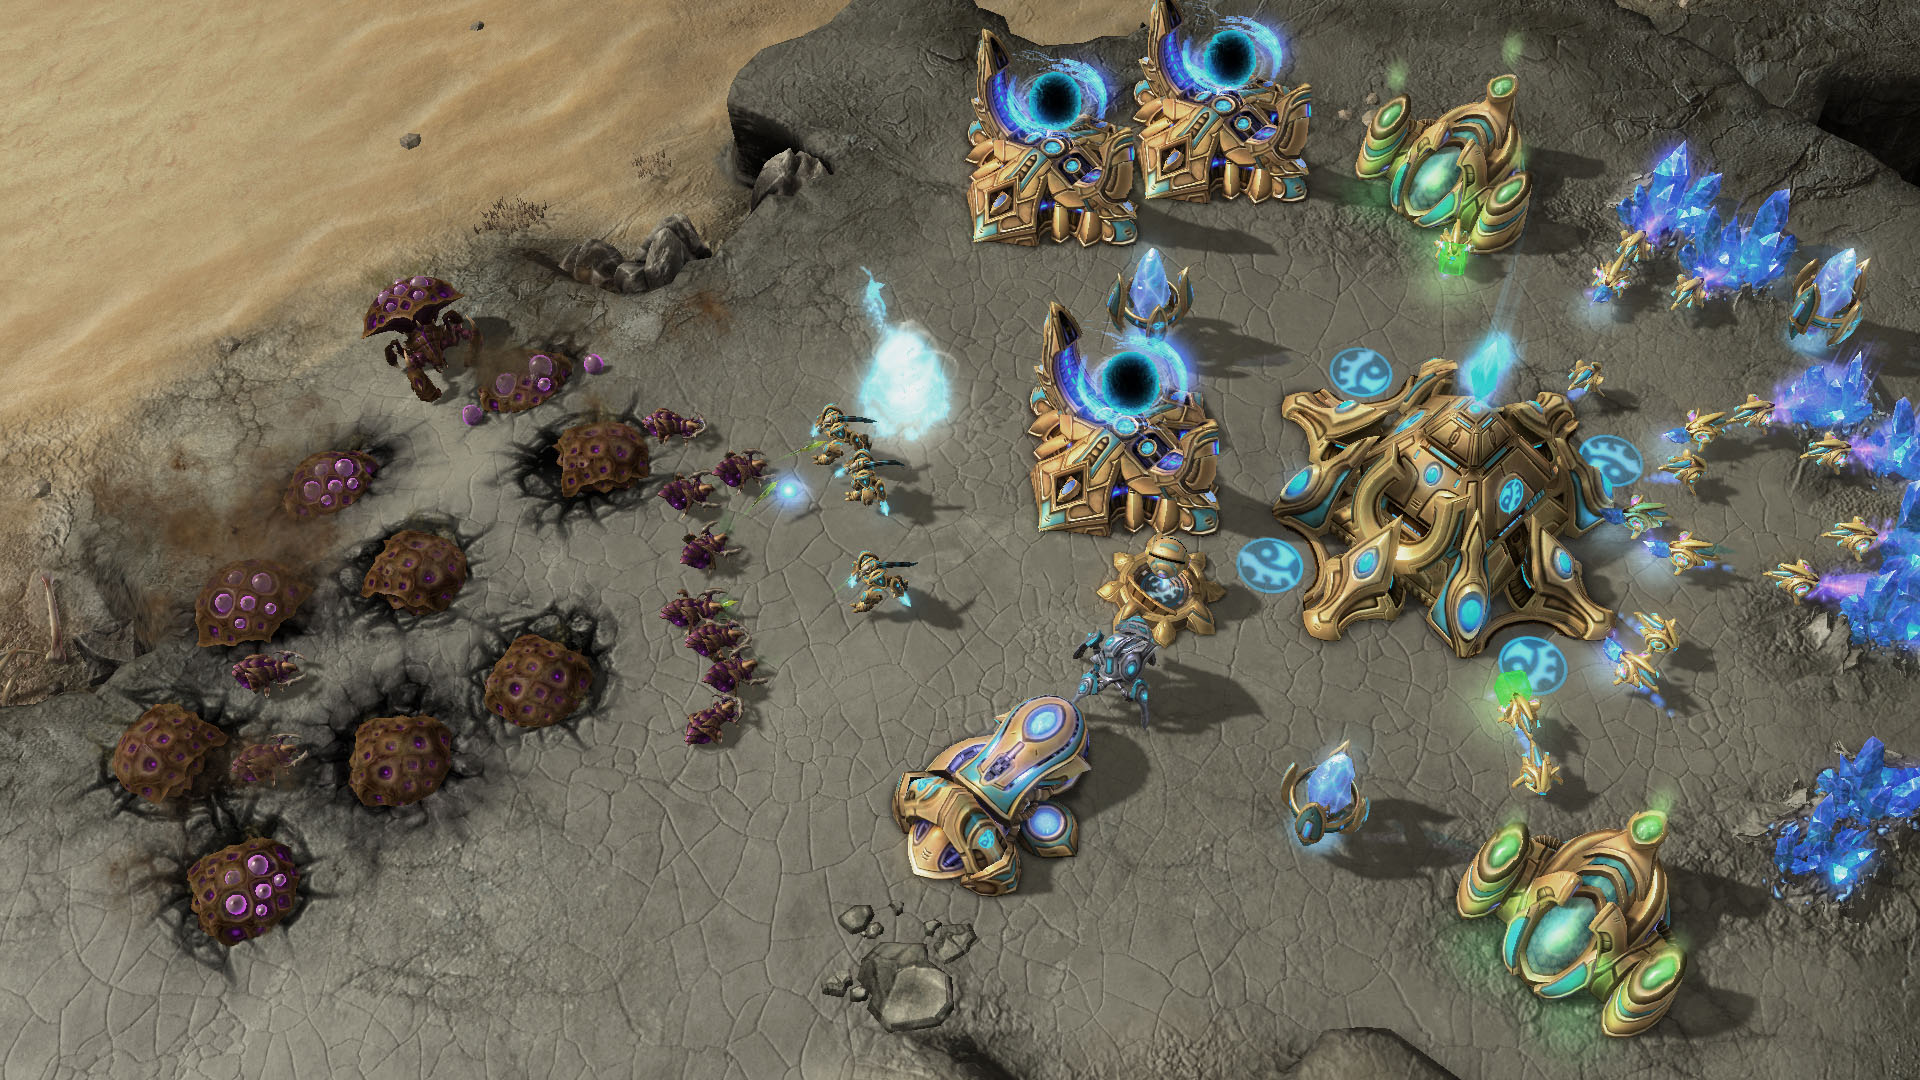
This project and article is not only a source for knowledge sharing but also a celebration of my love for gaming and the endless possibilities that data holds. It is a fusion of two great passions: gaming and Data Engineering. I grew up playing a lot of StarCraft: Brood War as well as StarCraft II, a real-time strategy video game where players control one of three unique factions in an intergalactic war, featuring resource management, base-building, and tactical combat. I never made it to the grandmaster ladder, where top-ranked players compete against each other, but I enjoyed every match experiencing the adrenaline rush of commanding armies, outmanoeuvring opponents, and claiming victory (from time to time at least).
Just as I fine-tuned my build orders and adapt to enemy tactics in StarCraft, I am now optimizing data pipelines, analyze trends, and visualize insights as a Data Engineer. In this article I would like to share knowledge about three useful technologies of today’s modern data stacks, which are namely:
⏱️ Apache Airflow: Platform for orchestrating and scheduling complex workflows.
🦆 DuckDB: Lightweight and versatile analytical database.
🚀 Streamlit: User-friendly framework for building interactive web applications.
In this article, I will explain the basics about each of the three technologies also giving examples how you can use them in your daily business.
Finally, everything comes together when we create an example project, a StarCraft II data pipeline, where we fetch data from the StarCraft II API and store the results in DuckDB, orchestrated via Airflow. We will also create a Streamlit app to visualize the data and have a look, how the current grandmaster ladder in StarCraft II looks like (spoiler: you will not find me in it). This is our final result:
Streamlit app for StarCraft II grandmaster ladder data
So, grab your mouse and keyboard, summon your inner Protoss, Zerg, or Terran commander, and join me on this epic journey through the realms of data and gaming.
Airflow
Apache Airflow is an open-source platform to programmatically author, schedule and monitor workflows using Python. Workflows are represented as Directed Acyclic Graphs (DAGs) and each vertex in the graph is one unit of work (task).
Often, workflows are so called Extract, Transform, Load (ETL) processes (or ELT, depending on when the transformation happens), but in in fact, Airflow is so flexible that any kind of workflow can be implemented.
Airflow comes with a web interface which allows to manage and monitor the DAGs. Airflow has four main components:
🌎 Webserver: Serves the Airflow web interface.
⏱️ Scheduler: Schedules DAGs to run at the configured times.
🗄️ Database: Stores all DAG and task metadata.
🚀 Executor: Executes the individual tasks.
When it comes to the database and executor, Airflow is very flexible. The SequentialExecutor for instance can be used for local development and runs one task at a time, while the CeleryExecutor or KubernetesExecutor allows for parallel execution on a cluster of worker nodes.
In this project, we will use Airflow to orchestrate the workflow of fetching data from the StarCraft II API and persisting it in DuckDB.
Welcome to the world of DuckDB! Imagine DuckDB as your trusty sidekick in the realm of data analysis. A lightweight yet powerful tool that packs a punch. Picture it as the agile scout in your StarCraft army, swiftly maneuvering through enemy lines to gather intelligence.
In this sample project, we will utilize DuckDB to persist the data from the StarCraft API in an embedded way, storing the data in a single file using DuckDB via Python.
But before we dive into the project, the following chapters will introduce DuckDB more in detail also explaining how you can benefit from utilizing it in your daily Data Engineering / Analytics business.
DuckDB: Your portable analytical database
Think of DuckDB as the Swiss Army knife of databases. It’s fast, efficient, and versatile, just like a Protoss Zealot on the battlefield, able to adapt to any situation with ease.
DuckDB is easy to install, portable and open-source. It is feature rich regarding its SQL dialect and you can import and export data based on different formats like CSV, Parquest and JSON. Also, it integrates seamlessly with Pandas dataframes, which makes it also a powerful data manipulation tool in your data wrangling scripts, which we will look at in the next chapter.
You can install it in your Python project simply via:
pipinstallduckdb
Afterwards, you can use DuckDB as an in-memory database on the fly:
importduckdbduckdb.execute("CREATE TABLE tbl AS SELECT 42 a")df=duckdb.execute("SELECT * FROM tbl").df()print(df)
    a
0  42
Or as an embedded database, persisting the data in a simple file:
importduckdb# create persisted database and write data
withduckdb.connect(database="my_duckdb.db")aswrite_conn:write_conn.execute("CREATE TABLE tbl AS SELECT 42 a")# somewhere else: read and process data
withduckdb.connect(database="my_duckdb.db",read_only=True)asread_conn:df=read_conn.execute("SELECT * FROM tbl").df()print(df)
Which will store all data in a file called my_duckdb.db. You can not only exchange data between DuckDB and Pandas dataframes, but also read and write CSV, JSON and more.
If you’re familiar with SQLite, think of DuckDB as its cooler, more performance-driven sibling. While SQLite is great for smaller-scale projects, DuckDB takes things up a notch. It’s like upgrading from a basic Terran Hellion to a powerful Thor unit, ready to handle larger datasets and complex queries without breaking a sweat.
DuckDB also offers a Command Line Interface (CLI). The DuckDB CLI is a simple executable precompiled for Windows, Mac, and Linux. On my Mac environment, I could simply install it via Homebrew with:
brew install duckdb
You can use this to connect to a DuckDB source or perform in-memory operations.
Analyze data with the DuckDB CLI
To show some of the capabilities, I used it to connect to the DuckDB database file, we will create as part of the project later, to run some analysis:
🥇 Protoss has the highest total wins but the lowest maximum MMR in the grandmaster ladder.
🥈 Terran has the highest maximum MMR in the grandmaster ladder.
🥉 Zerg has the least wins but the highest average MMR in the grandmaster ladder.
DuckDB: Your versatile data manipulation tool
While working on the first projects trying DuckDB I quickly realized, that it is more than a portable, lightweight analytical database. In fact, it can become really powerful if you add DuckDB as a tool to your toolbox for data wrangling.
At its core, DuckDB offers a seamless integration between SQL-based operations and other data processing tools like Pandas. This unique feature allows you to effortlessly switch between different technologies within your data processing scripts.
Instead of implementing data wrangling fully in SQL or within your Python script using typical libraries like Pandas or NumPy, you switch between these environments without the need to setup a complex database integration.
You can start fetching data from an API, load it to a Pandas dataframe, insert into an in-memory DuckDB, perform aggregations using SQL, write the result back to another dataframe and continue from there, without much overhead. Especially as a Data Engineer who works with SQL a lot, this gave me a powerful tool for my toolbox to create more intuitive data flows.
Just like in StarCraft, you have to choose the right units for the situation. You can create an army of Zealots but once your opponent attacks with a lot of Roaches, you should adjust your army composition and add Immortals and Void Rays to it. Same is true for your data wrangling scripts: by adding tools like DuckDB to your overall composition, your possibilities can cope with more challenges when processing data.
The following example reads the StarCraft II ladder data we will populate with the Airflow DAG, uses SQL for aggregation, writes the result to a Pandas dataframe, adds some column using Pandas, puts the result back to an in-memory DuckDB table and performs further transformation to finally move back to a Pandas dataframe.
importduckdbif__name__=='__main__':# use persisted duckdb
withduckdb.connect(database="sc2data.db")asconn:df=conn.sql(f"""
SELECT
favorite_race,
SUM(wins) AS total_wins,
SUM(losses) AS total_losses,
MAX(mmr) AS max_mmr,
AVG(mmr) AS avg_mmr
FROM ladder
WHERE favorite_race IN ('protoss', 'terran', 'zerg')
GROUP BY favorite_race
ORDER BY total_wins DESC;
""").df()print(df)# data wrangling in pandas
df["win_pct"]=(df["total_wins"]/(df["total_wins"]+df["total_losses"])*100)# use in-memory duckdb for further processing
duckdb.sql("""
CREATE TABLE aggregation AS
SELECT CASE
WHEN favorite_race = 'protoss' THEN 'p'
WHEN favorite_race = 'terran' THEN 't'
WHEN favorite_race = 'zerg' THEN 'z'
END AS fav_rc,
total_wins + total_losses AS total_games,
win_pct
FROM df;
""")# back to pandas
df_agg=duckdb.sql("SELECT * FROM aggregation;").df()print(df_agg)
With the code above and the StarCraft II API grandmaster ladder data, the following output is generated:
We can not only learn, that Protoss is the most famous choice in the grandmaster ladder but also, DuckDB’s compatibility with Pandas opens up a world of possibilities for data scientists and analysts. By seamlessly transitioning between DuckDB’s SQL capabilities and Pandas’ data manipulation functions, users can leverage the strengths of both platforms, maximizing efficiency and flexibility in their workflows.
In essence, DuckDB transcends the boundaries of a traditional database, evolving into a multifaceted tool that seamlessly integrates with other technologies for streamlined data processing.
Whether you’re crunching numbers, transforming datasets, or conducting complex analyses, DuckDB stands out as a reliable companion, offering the convenience of SQL alongside the versatility of Pandas and other libraries for efficient data manipulation.
Streamlit
Streamlit’s open-source app framework allows you to create shareable web apps to visualize and interact with data. You can run these apps locally or alternatively deploy them to the Streamlit Community Cloud for free. Streamlit itself already comes with a nice set of elements to render any kind of data, however, there are also a lot of third-party modules (so called components), that extend the possibilities of Streamlit.
You can install it in your Python project simply via:
pipinstallstreamlit
You then create your app in a dedicated script file and run it via the streamlit run command:
streamlit run your_script.py [-- script args]
Imagine your Python script as the code representation of your app from top to bottom. With:
importstreamlitasstst.title("My Streamlit App")
You get a web app with a simple header.
While with the following code:
importstreamlitasstst.dataframe(df)
You can render a dataframe as an interactive table. There are many more possibilities to visualize data. You will see one concrete use-case later, when we implement the app to render the StarCraft II data, so stay tuned and enjoy reading.
StarCraft II data pipeline with Airflow, DuckDB and Streamlit
The basic idea of the project is: we fetch data from the StarCraft II API. To be precise: we will fetch information about the so called grandmaster ladder, to see who is the best of the best in this game at the moment.
We will then store that data in a DuckDB file and orchestrate this process with an Airflow DAG using the TaskFlow API. Finally, we will use Streamlit to create a simple app.
The final project is also available on Github 🪄: https://github.com/vojay-dev/sc2-data-pipeline but the following chapters will explain how to implement this StarCraft II data pipeline step by step.
The environment I am running this on is:
OS: macOS Sonoma
Python: 3.11.8
Project setup
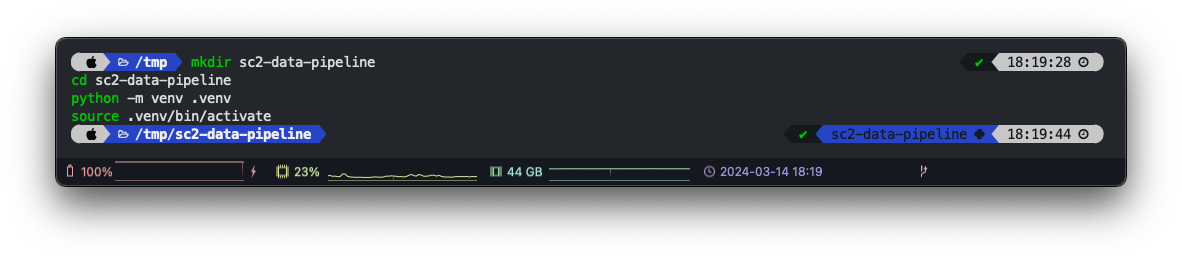
We start by creating a new Python project. For this, we create a new folder. Within this folder, we create a virtual environment with the the built-in venv module:
mkdir sc2-data-pipeline
cd sc2-data-pipeline
python -m venv .venv
source .venv/bin/activate
With the last command, we also activated the virtual environment, means: everything you execute in that terminal session will use the virtual Python rather than your system wide Python. This is crucial, as we want to keep the dependencies we will install next isolated within the project.
The project uses Airflow, DuckDB, Streamlit, Pandas and PyArrow, so next step is to install all requirements:
This will take a bit, which means: this is a good moment to grab a coffee ☕️.
As you can see, we are using Airflow 2.8.2. Also, you might already wonder why we install these dependencies manually rather than using Poetry or a requirements.txt at least. Installing Airflow locally works most stable using this approach and there is no official Poetry support yet, because of this and to keep it simple, we go for the manual approach.
Prepare Airflow
Airflow uses a folder called airflow on the local disc to manage some of its data, like the configuration files. Usually, this will be placed in the current users home directory. However, to avoid conflict with other projects, we will use the project folder as the basis for the airflow folder by setting the AIRFLOW_HOME environment variable accordingly.
When we first start Airflow in standalone mode, it will create the folder at the given location with a default configuration. It will use the SequentialExecutor and SQLite as a database, while storing the database file in the AIRFLOW_HOME location.
The following command will set the AIRFLOW_HOME environment variable to a folder called airflow in current directory (which is the project directory) and start Airflow in standalone mode. We also add another environment variable called NO_PROXY to the command. This is due to a known issue on macOS, which causes a SIGSEGV when running DAGs via the Airflow web interface.
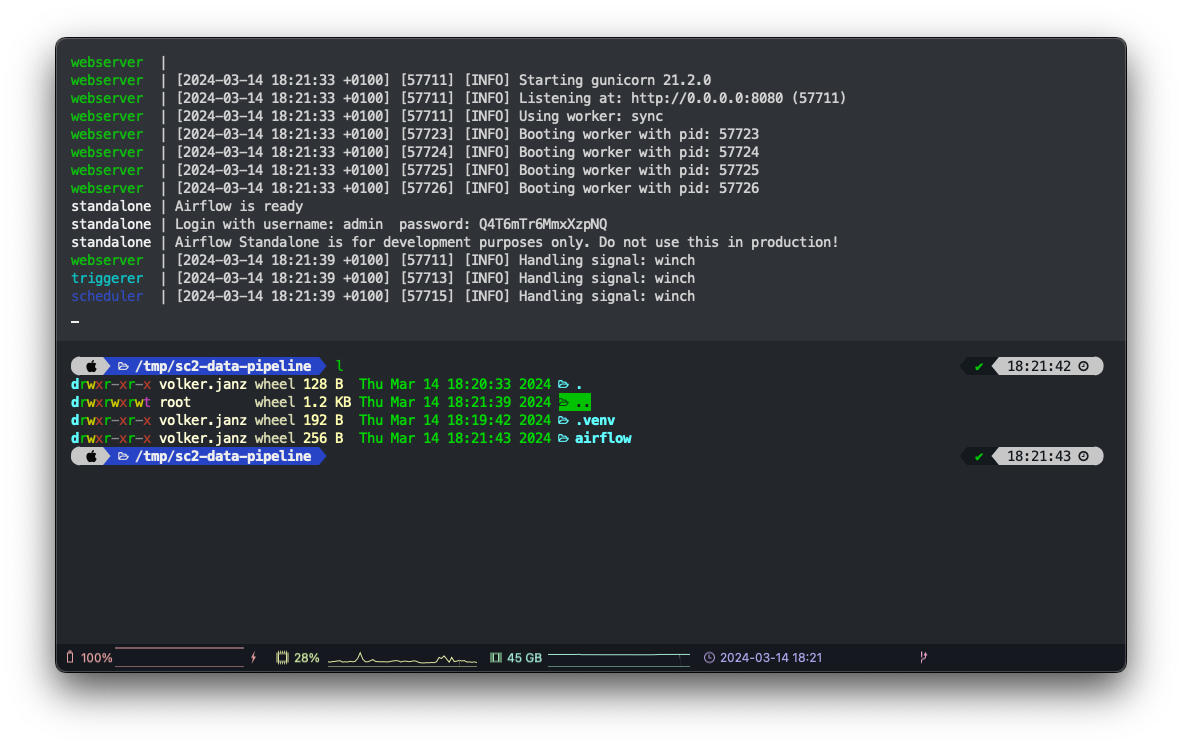
This will not only start Airflow but also create the airflow folder in the project directory. It will also automatically create an admin user for the web interface. You should see the username and password in the log output.
standalone | Airflow is ready
standalone | Login with username: admin  password: FZCvvSd8WVYDb2Vm
standalone | Airflow Standalone is for development purposes only. Do not use this in production!
You can now open http://localhost:8080/ in your browser and log in using the credentials from the log output.
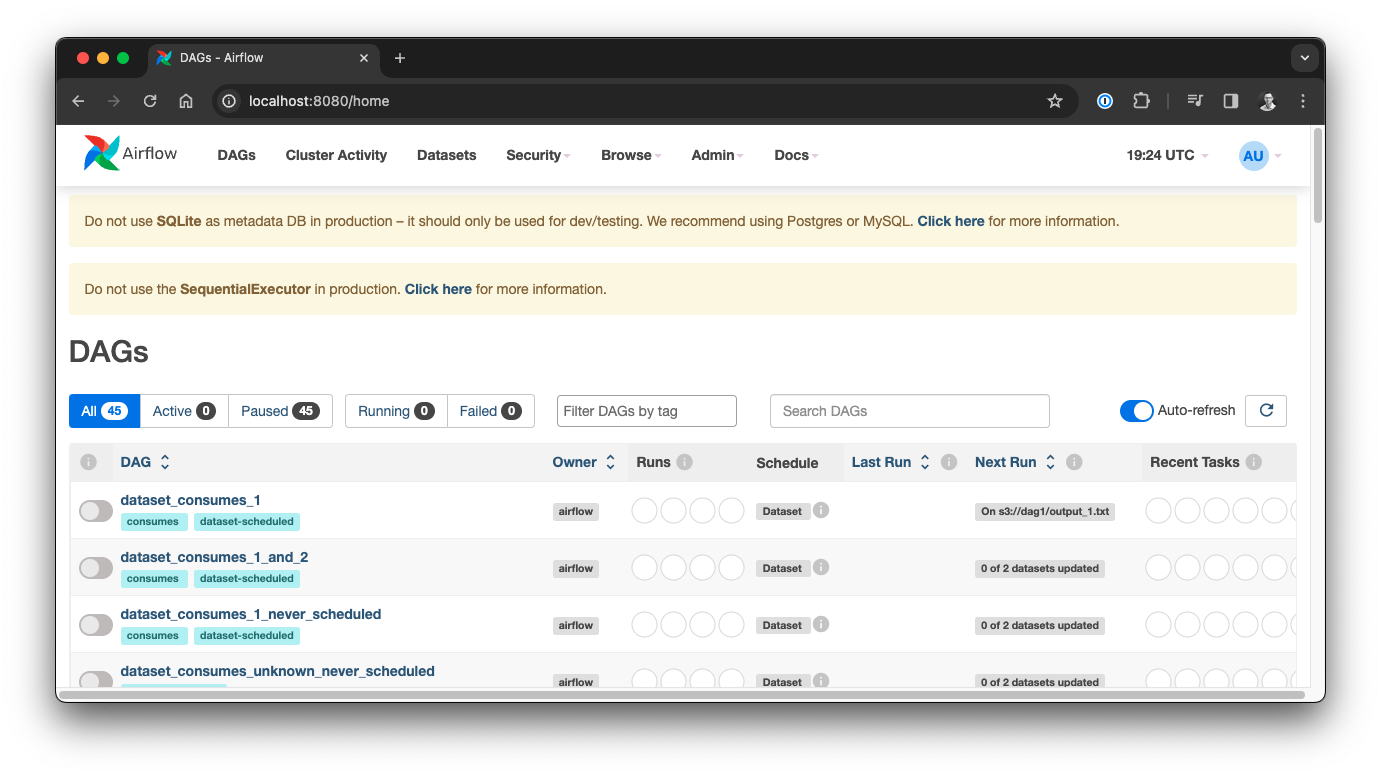
Congratulations 🎉, you have a pragmatic, local Airflow environment. The warnings in the web interface show up because you are automatically using the SequentialExecutor and a SQLite database in standalone mode, so of course this is not meant for production usage.
You can stop the standalone process with control+c.
Before we work on our DAG, let us prepare the environment a bit more.
One thing you might have noticed: there are a bunch of example DAGs. Personally, I like to have a clean environment to start with. These examples are created on startup, when a specific configuration variable is set. So first, let’s change this part of the configuration.
Since we set the AIRFLOW_HOME variable to the airflow folder within the project folder, the location of the configuration file is airflow/airflow.cfg.
Open the configuration in your favourite editor, and change the following configuration:
load_examples = False
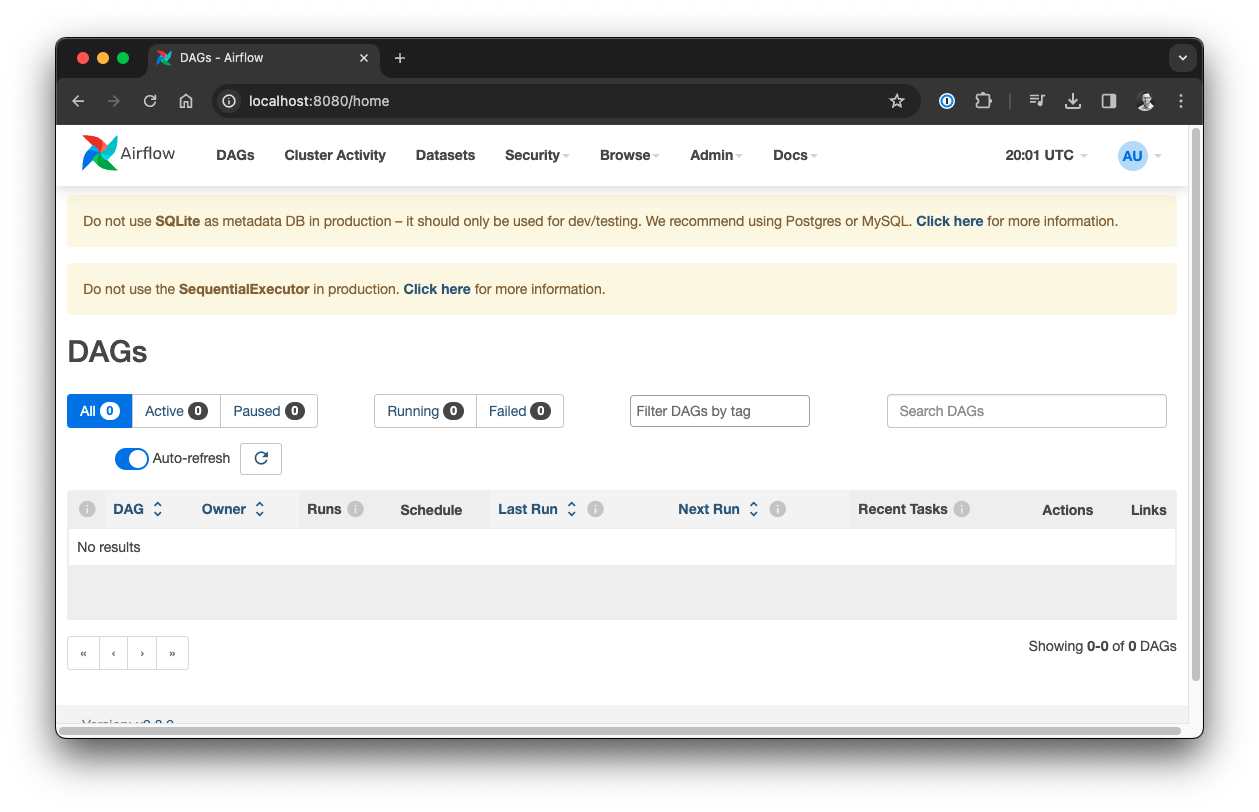
Even if you now restart the standalone process, the example DAGs may still show up as they are persisted in the database. Therefore, we also need to reset the database accordingly with the following command (ensure to activate your virtual environment first and be in the project folder).
NO_PROXY="*"AIRFLOW_HOME="$(pwd)/airflow" airflow db reset
Confirm with y and afterwards start your environment again, you now have a clean state. This will generate a new admin user but no example DAGs this time.
Before we create our DAG, there is one more thing we should adjust. Usually, when we commit our project to Git repository, we do not want to add the airflow folder. First of all because this does not reside in the project folder in the production environment but also because this is our local environment and we want to ensure other developers can setup their own environment accordingly.
Consequently, we would add airflow/ to the .gitignore file. But there is an issue with this approach: per default, Airflow looks for DAGs in a folder called dags within the airflow folder, so: airflow/dags. If we add our DAG implementation to that folder, but ignore the airflow/ folder in our .gitignore file, we can’t commit our code to the repository without workarounds.
Luckily, the solution is simply to change the DAGs folder in the Airflow configuration. To solve this, we will set this variable to a folder called dags within the project folder.
To do so, open airflow/airflow.cfg again, and look for the dags_folder variable. Set it so that it points to a folder called dags in your project folder, for example:
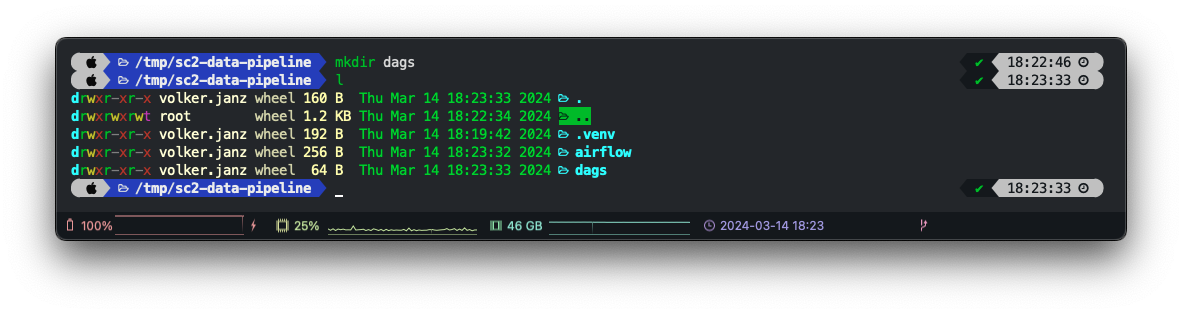
dags_folder = /tmp/sc2-data-pipeline/dags
Finally, we create the empty dags folder within our project and we are ready to go.
The limits are quite generous: 36000 requests per hour and 100 requests per second, so we can run our DAG as often as we like in this scenario.
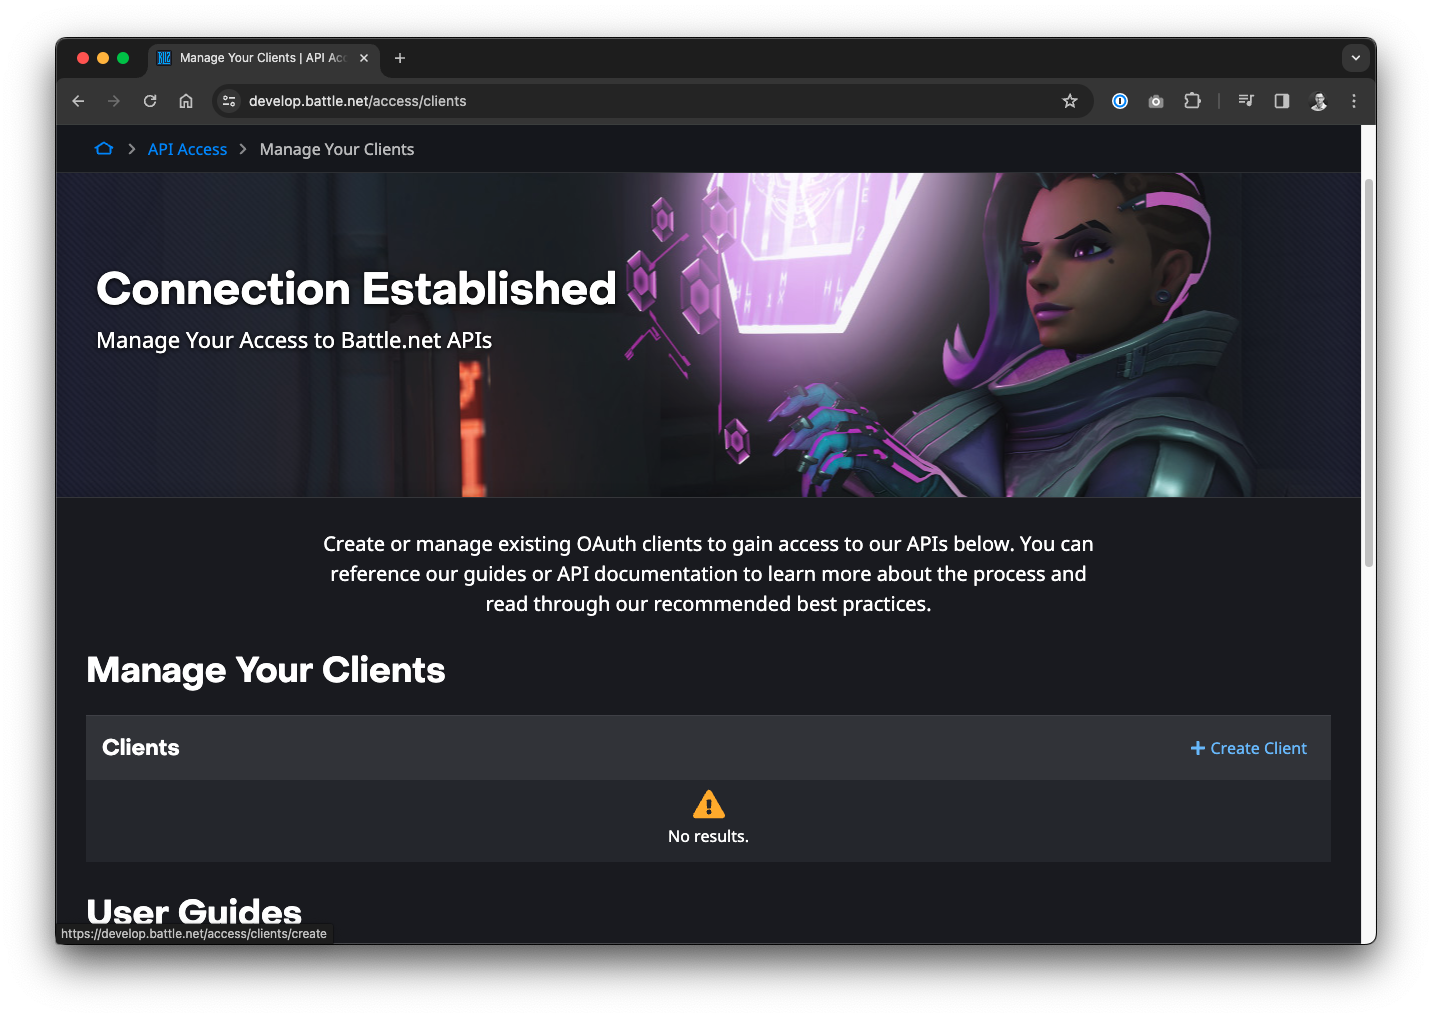
To get access, you need to create an OAuth client, which you can do for free with your battle.net account. Simply go to https://develop.battle.net/access/clients, log in with your battle.net account and create a client.
That way you will obtain:
a client ID and
a client secret.
Both of them are needed to access the API, so keep them save.
The basic flow is, that we first get an access token using our client ID and secret and then use this token to get data from the community APIs. The following example shows how to do this via curl and jq in a terminal. jq can be installed via brew install jq.
With our client ID and secret ready, we can now implement the DAG to fetch and persist the grandmaster ladder data.
Implement DAG
Create a Python file sc2.py in the dags folder, it will be the implementation of our DAG. Add the following code, which is basically the DAG implementation using the TaskFlow API. We will have a look a some details afterwards:
importloggingimportpendulumimportrequestsfromairflow.decoratorsimportdag,task,task_groupfromairflow.modelsimportVariablefromrequests.adaptersimportHTTPAdapterfromurllib3importRetryimportduckdbimportpandasaspdlogger=logging.getLogger(__name__)DUCK_DB="sc2data.db"CLIENT_ID="your_client_id"CLIENT_SECRET="your_client_secret"BASE_URI="https://eu.api.blizzard.com"REGION_ID=2# Europe
# retry strategy for contacting the StarCraft 2 API
MAX_RETRIES=4BACKOFF_FACTOR=2@dag(start_date=pendulum.now())defsc2():retry_strategy=Retry(total=MAX_RETRIES,backoff_factor=BACKOFF_FACTOR)adapter=HTTPAdapter(max_retries=retry_strategy)session=requests.Session()session.mount('https://',adapter)@taskdefget_access_token()->str:data={"grant_type":"client_credentials"}response=session.post("https://oauth.battle.net/token",data=data,auth=(CLIENT_ID,CLIENT_SECRET))returnresponse.json()["access_token"]@taskdefget_grandmaster_ladder_data(token:str):headers={"Authorization":f"Bearer {token}"}response=session.get(f"{BASE_URI}/sc2/ladder/grandmaster/{REGION_ID}",headers=headers)ladder_teams=response.json().get("ladderTeams",[])return[{"id":lt["teamMembers"][0]["id"],"realm":lt["teamMembers"][0]["realm"],"region":lt["teamMembers"][0]["region"],"display_name":lt["teamMembers"][0]["displayName"],"clan_tag":lt["teamMembers"][0]["clanTag"]if"clanTag"inlt["teamMembers"][0]elseNone,"favorite_race":lt["teamMembers"][0]["favoriteRace"]if"favoriteRace"inlt["teamMembers"][0]elseNone,"previous_rank":lt["previousRank"],"points":lt["points"],"wins":lt["wins"],"losses":lt["losses"],"mmr":lt["mmr"]if"mmr"inltelseNone,"join_timestamp":lt["joinTimestamp"]}forltinladder_teamsiflt["teamMembers"]andlen(lt["teamMembers"])==1]defget_profile_metadata(token:str,region:str,realm:int,player_id:int)->dict:headers={"Authorization":f"Bearer {token}"}response=session.get(f"{BASE_URI}/sc2/metadata/profile/{region}/{realm}/{player_id}",headers=headers)returnresponse.json()ifresponse.status_code==200elseNone@taskdefenrich_data(token:str,data:list)->list:logger.info("Fetching metadata for %d players",len(data))fori,playerinenumerate(data,start=1):logger.info("Fetching metadata for player %d/%d",i,len(data))metadata=get_profile_metadata(token,player["region"],player["realm"],player["id"])player["profile_url"]=metadata.get("profileUrl")ifmetadataelseNoneplayer["avatar_url"]=metadata.get("avatarUrl")ifmetadataelseNoneplayer["name"]=metadata.get("name")ifmetadataelseNonereturndata@taskdefcreate_pandas_df(data:list)->pd.DataFrame:returnpd.DataFrame(data)@taskdefstore_data_in_duckdb(ladder_df:pd.DataFrame)->None:withduckdb.connect(DUCK_DB)asconn:conn.sql(f"""
DROP TABLE IF EXISTS ladder;
CREATE TABLE ladder AS
SELECT * FROM ladder_df;
""")@task_groupdefget_data()->list:access_token=get_access_token()ladder_data=get_grandmaster_ladder_data(access_token)returnenrich_data(access_token,ladder_data)@task_groupdefstore_data(enriched_data:list)->None:df=create_pandas_df(enriched_data)store_data_in_duckdb(df)store_data(get_data())sc2()
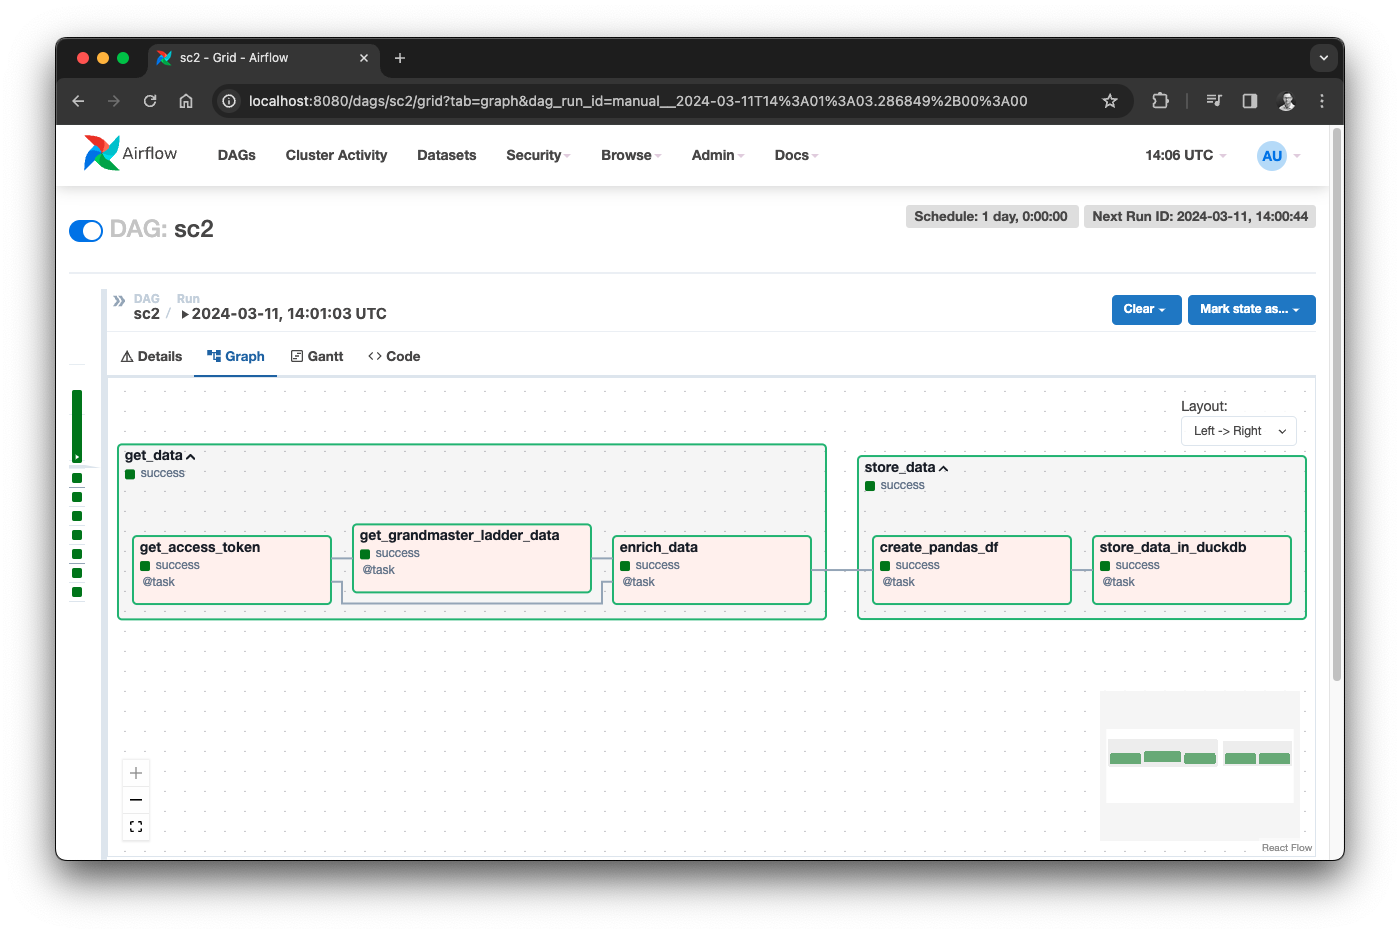
The basic flow of the DAG is rather simple, it has 2 main task groups that are connected: get_data and store_data.
We will now look at some of the key elements of these task groups.
Get data
Getting data happens in the following 3 steps, each of them running as a task in Airflow:
🔐 get_access_token: Get a fresh access token using your client ID and secret.
📝 get_grandmaster_ladder_data: Get the latest grandmaster ladder data with all players using the token.
👥 enrich_data: Using a different API endpoint, we enrich each entry in the ladder with the players profile URL, avatar and name.
Instead of directly using the requests.get or requests.post functions, we create a session which we use for all requests. That way, we can also define a retry strategy together with a backoff strategy. This is recommend if you fetch data from external API sources, since you don’t want to let your DAG fail just because the API is temporarily not available.
In get_grandmaster_ladder_data we get the latest grandmaster ladder from the https://eu.api.blizzard.com/sc2/ladder/grandmaster/{REGION_ID} endpoint, whereas REGION_ID is set to 2 in our case, to get the data for Europe.
Finally, in the enrich_data task, we call the https://eu.api.blizzard.com/sc2/metadata/profile/{region}/{realm}/{player_id} endpoint for each player who is part of the ladder and enrich the existing player entry. Calling the endpoint itself is encapsulated in the get_profile_metadata helper function.
Store data
Storing data happens in the following 2 steps, each of them running as a task in Airflow:
🐼 create_pandas_df: Create a Pandas dataframe based on the list of players.
🦆 store_data_in_duckdb: Store the dataframe in DuckDB persisted in a file.
As mentioned before, DuckDB can read and write different formats, including Pandas dataframes. Thus, the first step is to create a dataframe from our list of dictionaries, whereas each dictionary is a player of the ladder.
Storing this dataframe in DuckDB is amazingly easy. You might be surprised reading the code for the first time but yes: you can reference the dataframe variable in your SQL:
@taskdefstore_data_in_duckdb(ladder_df:pd.DataFrame)->None:withduckdb.connect(DUCK_DB)asconn:conn.sql(f"""
DROP TABLE IF EXISTS ladder;
CREATE TABLE ladder AS
SELECT * FROM ladder_df;
""")
Since we persist the data in a file, we delete the existing data on each run to only store the latest information. We could use a INSERT OR REPLACE but then we would need to define the primary key constraint, which is not possible when directly creating the table based on a dataframe. But for our use-case this approach is sufficient. In such cases I like to remind people of the KISS principle:
Keep it simple, stupid!
After storing the data, the DAG is done and we can move on to visualize it.
Visualize data using Streamlit
For our Streamlit app, we create a new file in the root directory of the project: app.py. You can simply add the following content:
You will get a simple web page with a header. It will automatically refresh as you extend your app. Now, let’s replace the content with our actual app, that is reading data from DuckDB and renders it for us:
importstreamlitasstimportduckdbcon=duckdb.connect(database="sc2data.db",read_only=True)st.title("StarCraft 2 Grandmaster Ladder")@st.cache_datadefload_ladder_data():df=con.execute("SELECT * FROM LADDER").df()# sort by mmr and move avatar to first column
df.sort_values("mmr")avatar_url=df.pop("avatar_url")df.insert(0,"avatar",avatar_url)returndf@st.cache_datadefload_favorite_race_distribution_data():df=con.execute("""
SELECT favorite_race, COUNT(*) AS count
FROM LADDER
WHERE favorite_race IS NOT NULL
GROUP BY 1
ORDER BY 2 DESC
""").df()returndfladder=load_ladder_data()st.dataframe(ladder,column_config={"avatar":st.column_config.ImageColumn("avatar")})distribution_data=load_favorite_race_distribution_data()st.bar_chart(distribution_data,x="favorite_race",y="count")
This will finally visualize the StarCraft II grandmaster ladder data ordered by MMR, and even shows the avatars of the players:
Streamlit app for StarCraft II grandmaster ladder data
The app implementation shows again a nice example how to combine Pandas dataframes with DuckDB as a powerful data wrangling toolkit:
df=con.execute("SELECT * FROM LADDER").df()# sort by mmr and move avatar to first column
df.sort_values("mmr")avatar_url=df.pop("avatar_url")df.insert(0,"avatar",avatar_url)returndf
You can not only render dataframes with Streamlit easily, but even replace specific columns to modify how they are rendered in the app. In this example, we take the URL from the avatar column and render it as an image:
Finally, we see that Protoss seems to be the most prominent faction in the grandmaster ladder, which is nice, since I am a former Protoss player myself 😉.
Conclusion
In conclusion, our journey creating a data pipeline with Apache Airflow, Streamlit, and DuckDB has provided invaluable technical insights into orchestrating data pipelines and crafting interactive data applications.
DuckDB emerged as a robust companion in data wrangling challenges, offering seamless integration with Pandas dataframes and advanced analytical SQL capabilities. Its lightweight nature and efficient performance underscored its suitability for analytical workloads in resource-constrained environments.
Streamlit, with its intuitive interface and powerful visualization capabilities, showcased the potential for rapid development of interactive data applications.
As we reflect on our exploration of these technologies, we recognize the significance of their roles in modern Data Engineering and Analytics workflows. Just like a StarCraft II grandmaster player, plan your unit composition carefully, always extend and optimize your Data Engineering toolbox. Until our next quest in the realm of data, may your pipelines flow smoothly and your victories be as sweet as a perfectly timed Ravager shot.
Minds and Machines - AI for Mental Health Support, Fine-Tuning LLMs with LoRA in Practice
Explore the potential of Large Language Models (LLMs) changing the future of mental healthcare and learn about how to apply Parameter-Efficient Fine-Tuning (PEFT) to create an AI-powered mental health support chatbot by example
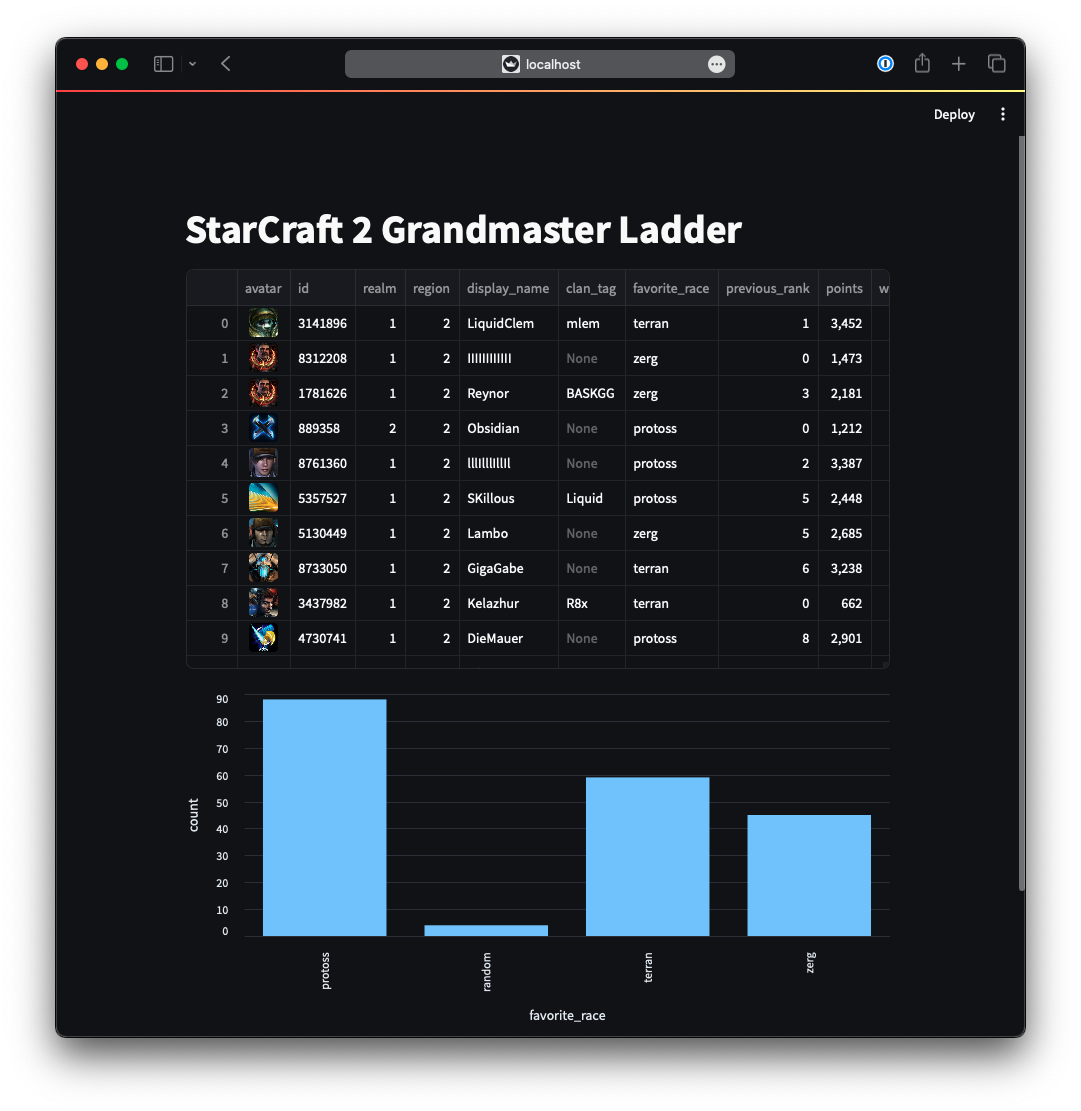 Streamlit app for StarCraft II grandmaster ladder data
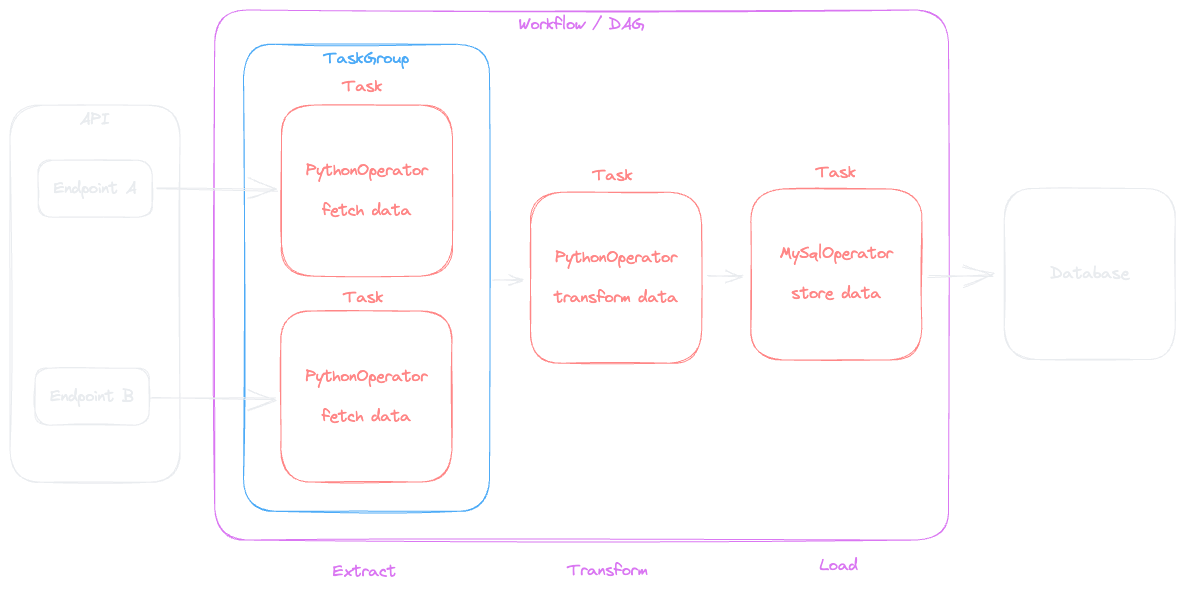
 Based on StarCraft II
 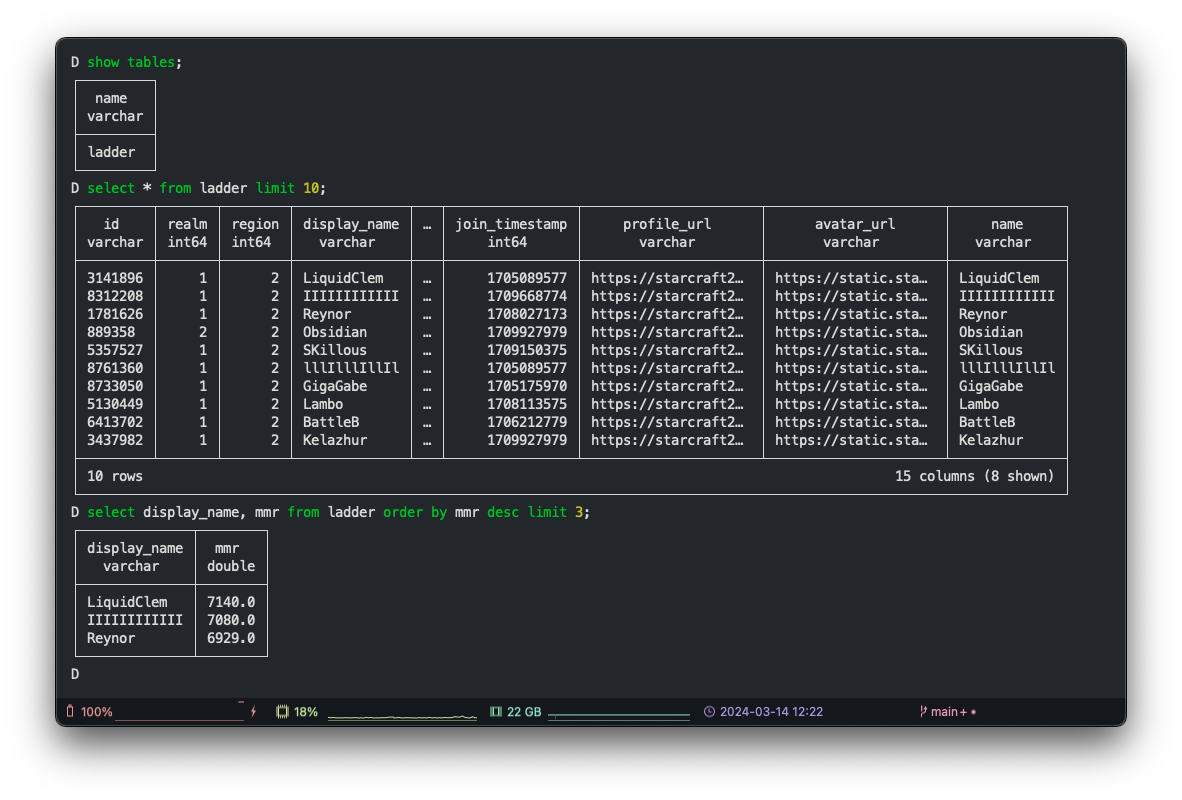 Analyze data with the DuckDB CLI
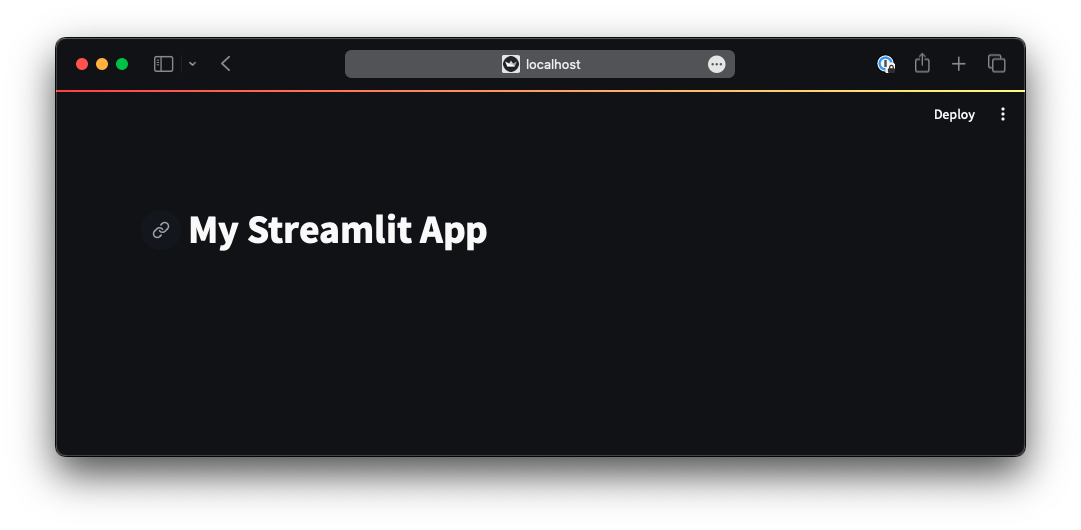


