Airflow 3 and Airflow AI SDK in Action - Analyzing League of Legends
Learn Key Airflow 3 and AI Features Through a Practical League of Legends Data Project
Note: This is not clickbait; it is genuinely impressive, and I use it daily. 🤫
The alarm blares at 6:00 AM. You groggily reach for your phone, squinting at the screen. A wall of notifications greets you - emails, Slack messages, news updates. It’s a digital overload, and you haven’t even had your coffee yet.
 Digital overload , source: generated with Adobe Firefly
As you scroll through the endless stream of information you’re drowning in data, struggling to keep up. Then you remember the long Slack message from that colleague last night you put on read-later. Oh boy, we all know that one colleague.
At my job, I confess, this is totally me! So, to my colleagues: I’m sorry, and I hope this article will inspire you with some ideas on how modern AI can help you cope with my desperate need to write Slack essays.
And who knows what confidential information might be buried within that wall of text? You can’t simply copy and paste it into an online AI tool; your company strictly prohibits sharing sensitive data with external services. But wait! Imagine this: you copy the text, run a simple shortcut, and instantly get a concise summary, all without leaving your machine. No worries about data privacy, no concerns about costs or subscription limits.
I remember the first time I experimented with running AI models on my own machine. It felt like magic! Suddenly, I had this incredible capability at my fingertips for free. Creating little helper scripts quickly became an addiction.
It’s all local, secure, and under your control. This is the power of local AI. It’s not just about handling information overload; it’s about doing so safely, privately, and efficiently. It’s not about replacing your intelligence, but augmenting it, providing a lifeline in the sea of information while respecting the boundaries of confidentiality.
In this article, we’ll dive deep into the world of local AI, exploring how tools like Ollama and state-of-the-art models like Gemma 2 and LLaVA can transform your daily workflow. We’ll go beyond the hype and get practical, showing you how to turn complex tasks into simple, efficient processes. Unlock a new level of productivity and reclaim control over your digital life, all while keeping your sensitive data safe and secure, all before getting your first coffee.
Note from author: this is an exaggeration, I never run any script before my first coffee of course. Anyway, let’s dive in!
Let’s prepare our environment. The following instructions were tested on macOS 15.2 with Homebrew installed, but they can also be adapted for other systems, so get ready to be inspired. First, we will install Ollama, start the Ollama server, and use the client to download the Gemma 2 and LLaVA models.
brew install ollama
ollama serve # starts the server

# pull models in another terminal window
ollama pull gemma2
ollama pull llava
Ollama empowers you to run powerful AI models right on your local machine, offering enhanced transparency, control, and customization compared to closed-source cloud-based solutions.
I have to admit that one downside is that you need to store and process the model on your local machine. While my MacBook is powerful enough to run Gemma 2 and it works well in most cases, more advanced models like Llama 3.3 70B can take a while to process requests. Additionally, Gemma 2 only requires 5.3 GB, whereas Llama 3.3 uses 43 GB of space. This means that when experimenting with Ollama, you can quickly fill up your disk. I was surprised when my Mac complained. 😅
Ollama is made up of two main components: the client and the server. The client is the part that users interact with, while the server serves as a backend service implemented in Go.
Ollama includes model files that can be utilized to create and share models. These files contain essential information such as the base model, parameters, prompt templates, system messages, and more. By default, these models are stored in ~/.ollama.
tree ~/.ollama/models
du -shc ~/.ollama/models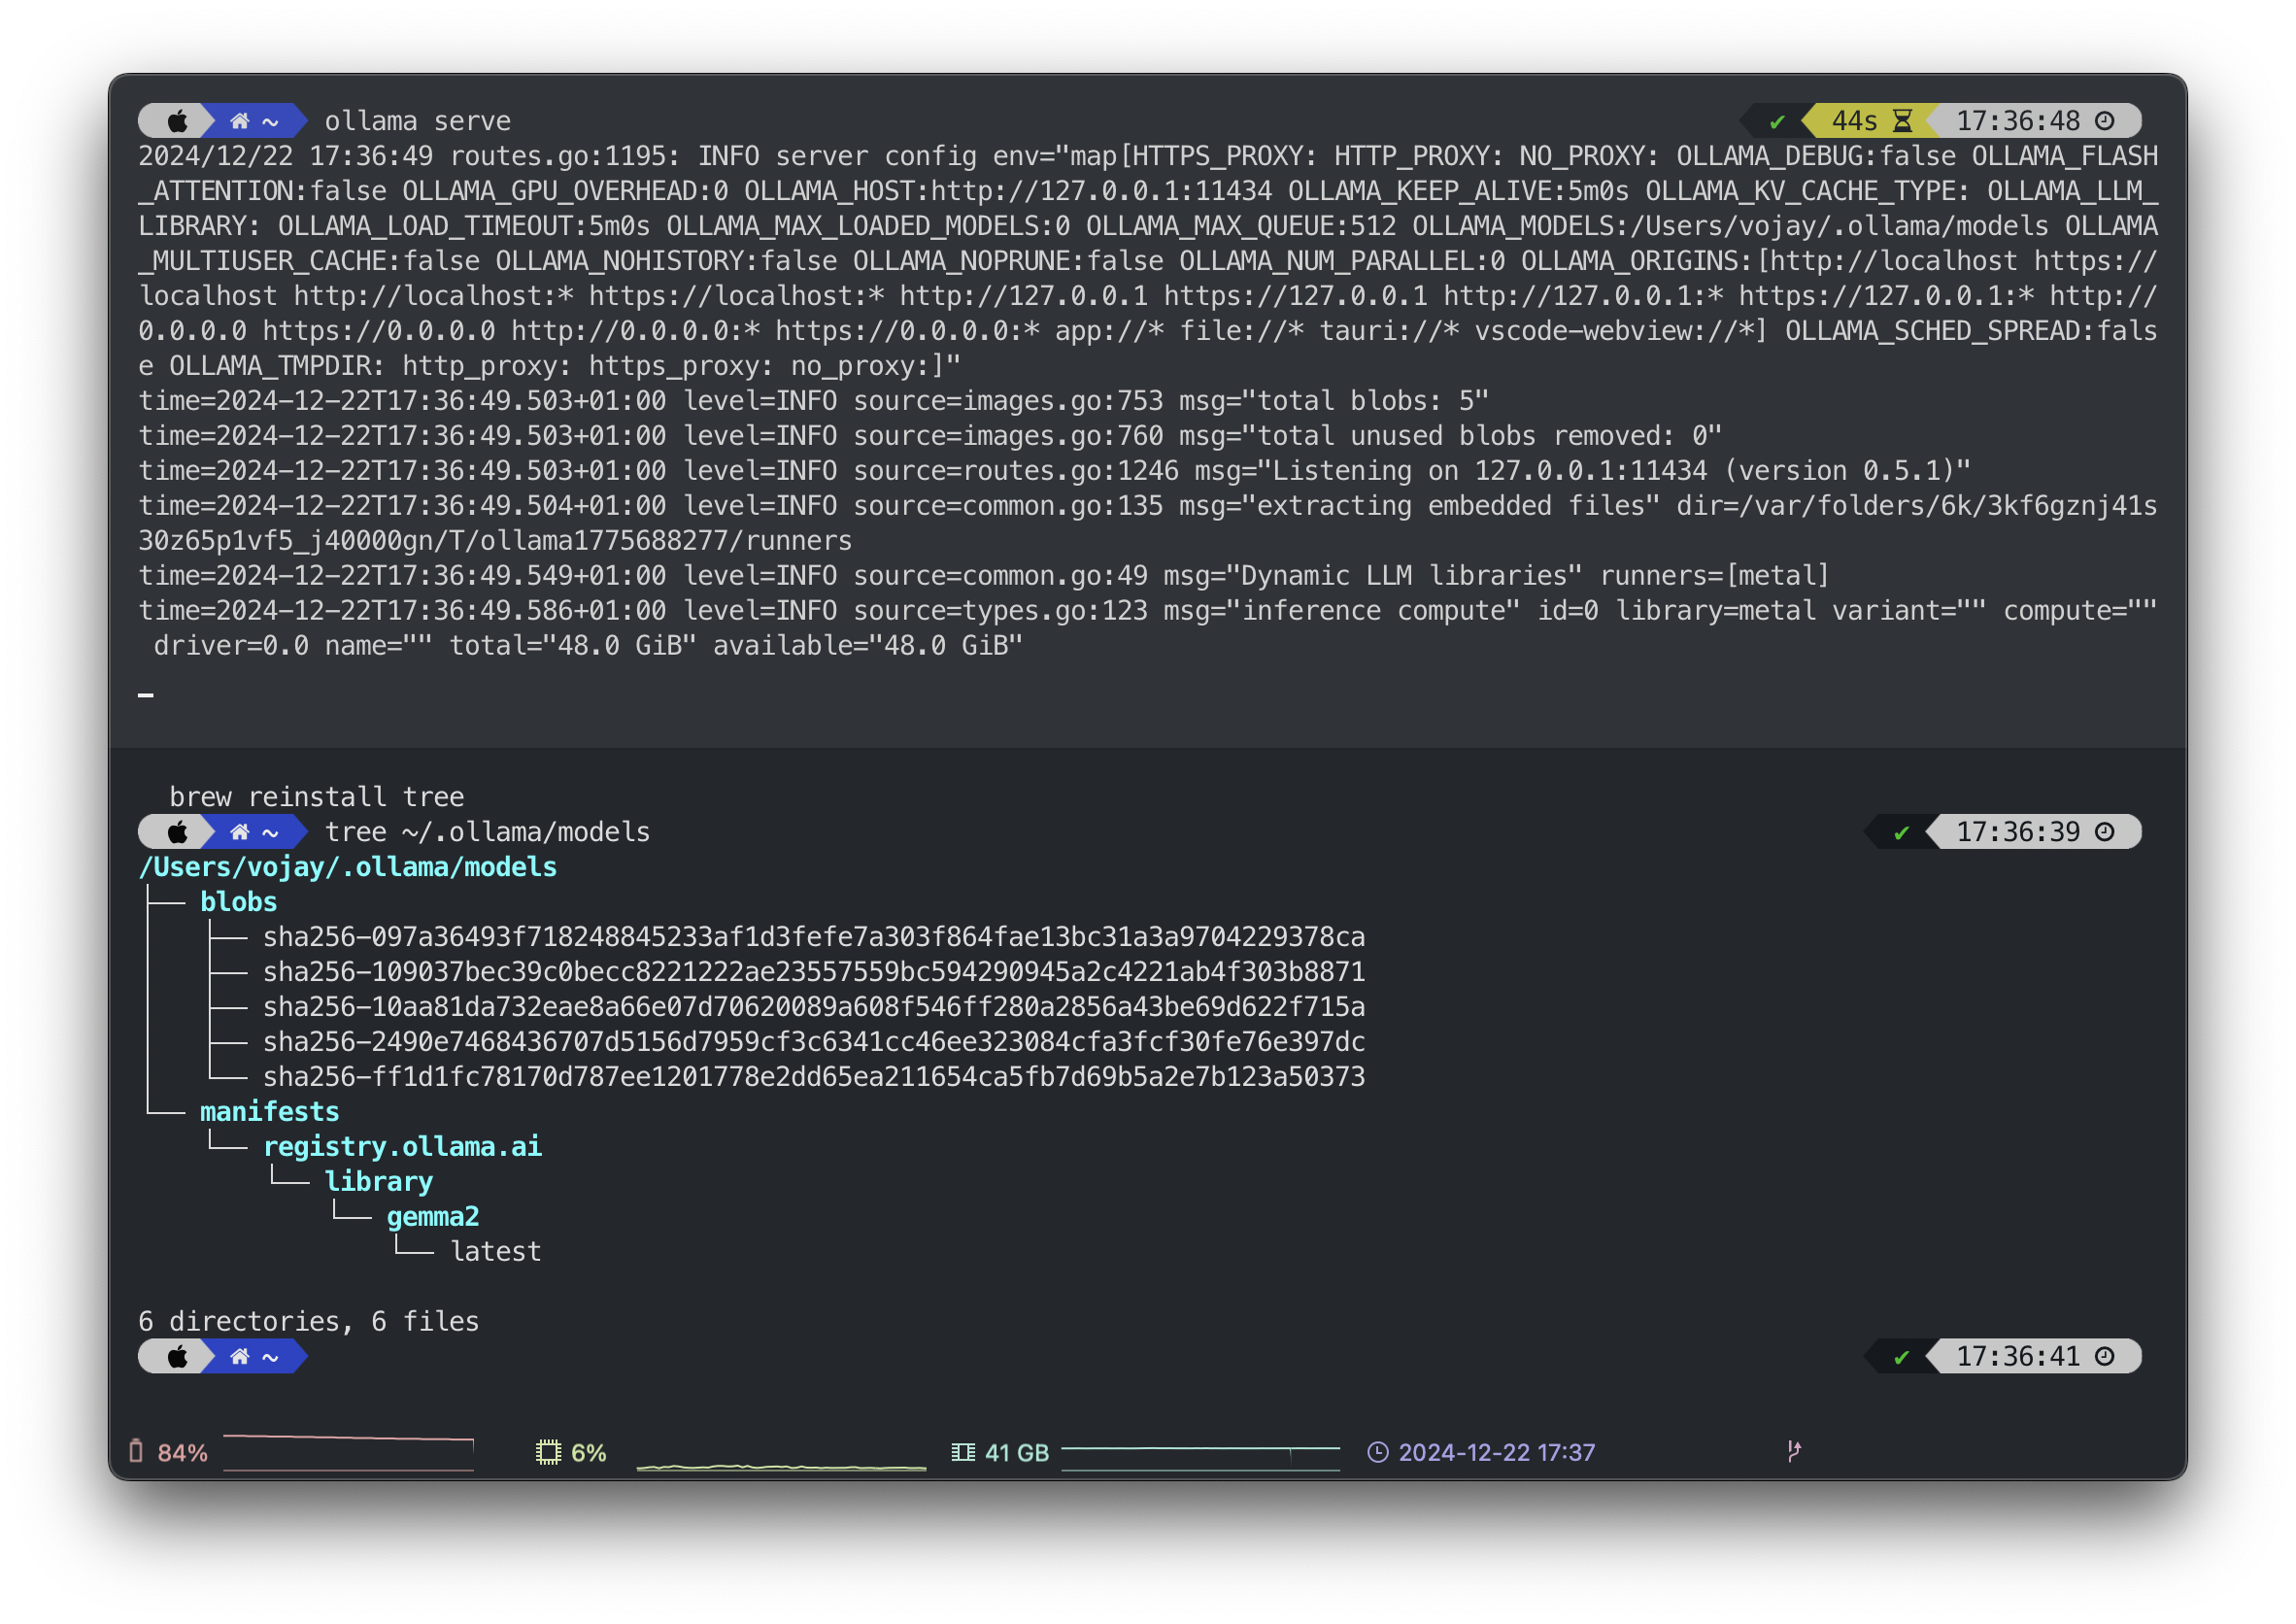 Ollama server and local models, source: by author
In this article, we mainly utilize the Gemma 2 model developed by Google. Gemma is a collection of lightweight, cutting-edge open models created using the same research and technology that powered the Gemini models. They provide an excellent balance between quality and resource requirements.
Additionally, we will use the 🌋 LLaVA (Large Language and Vision Assistant) model, an end-to-end trained large multimodal model that integrates a vision encoder and Vicuna for comprehensive visual and language understanding.
I bet everyone reading this is using cmd+c (or ctrl+c), cmd+v (or ctrl+v) to copy and paste at least once a day.
You can go do the exact same thing in your Mac terminal with pbcopy and pbpaste. pbcopy will allow you to copy the output of a command right into your clipboard. Vice-versa for pbpaste, it will allow you to paste your clipboard right into your terminal.
I often use this for small helper Bash scripts. You can pipe your clipboard to any other command, such as pbpaste | cat. This provides many possibilities.
Unfortunately the pbcopy and pbpaste commands are exclusively for Mac, but you can recreate these commands on Linux by using xsel.
We will make use of pbcopy and pbpaste in the following examples. We will also use a command called glow. Glow is a terminal based markdown reader allowing to read documentation directly on the command line, which can be installed via:
brew install glowWith that, we are ready to unleash the magic of local LLMs and simple Bash scripting.
Note upfront: for all demos, please ensure your local Ollama server is up and running.
ollama serveWith ollama run <model> <prompt>, we can directly execute a prompt against a local model.
Pro tip: If you pipe the output from a command to ollama run, it will be appended to the prompt. This feature enables impressive productivity hacks, which we will explore next.
Let’s start by reviewing some code. We cat a source file, pipe it to ollama run and render the markdown response of the model with glow:
cat ~/projects/biasight/biasight/parse.py | ollama run gemma2 "Review the following code and suggest improvements in a concise way:" | glow -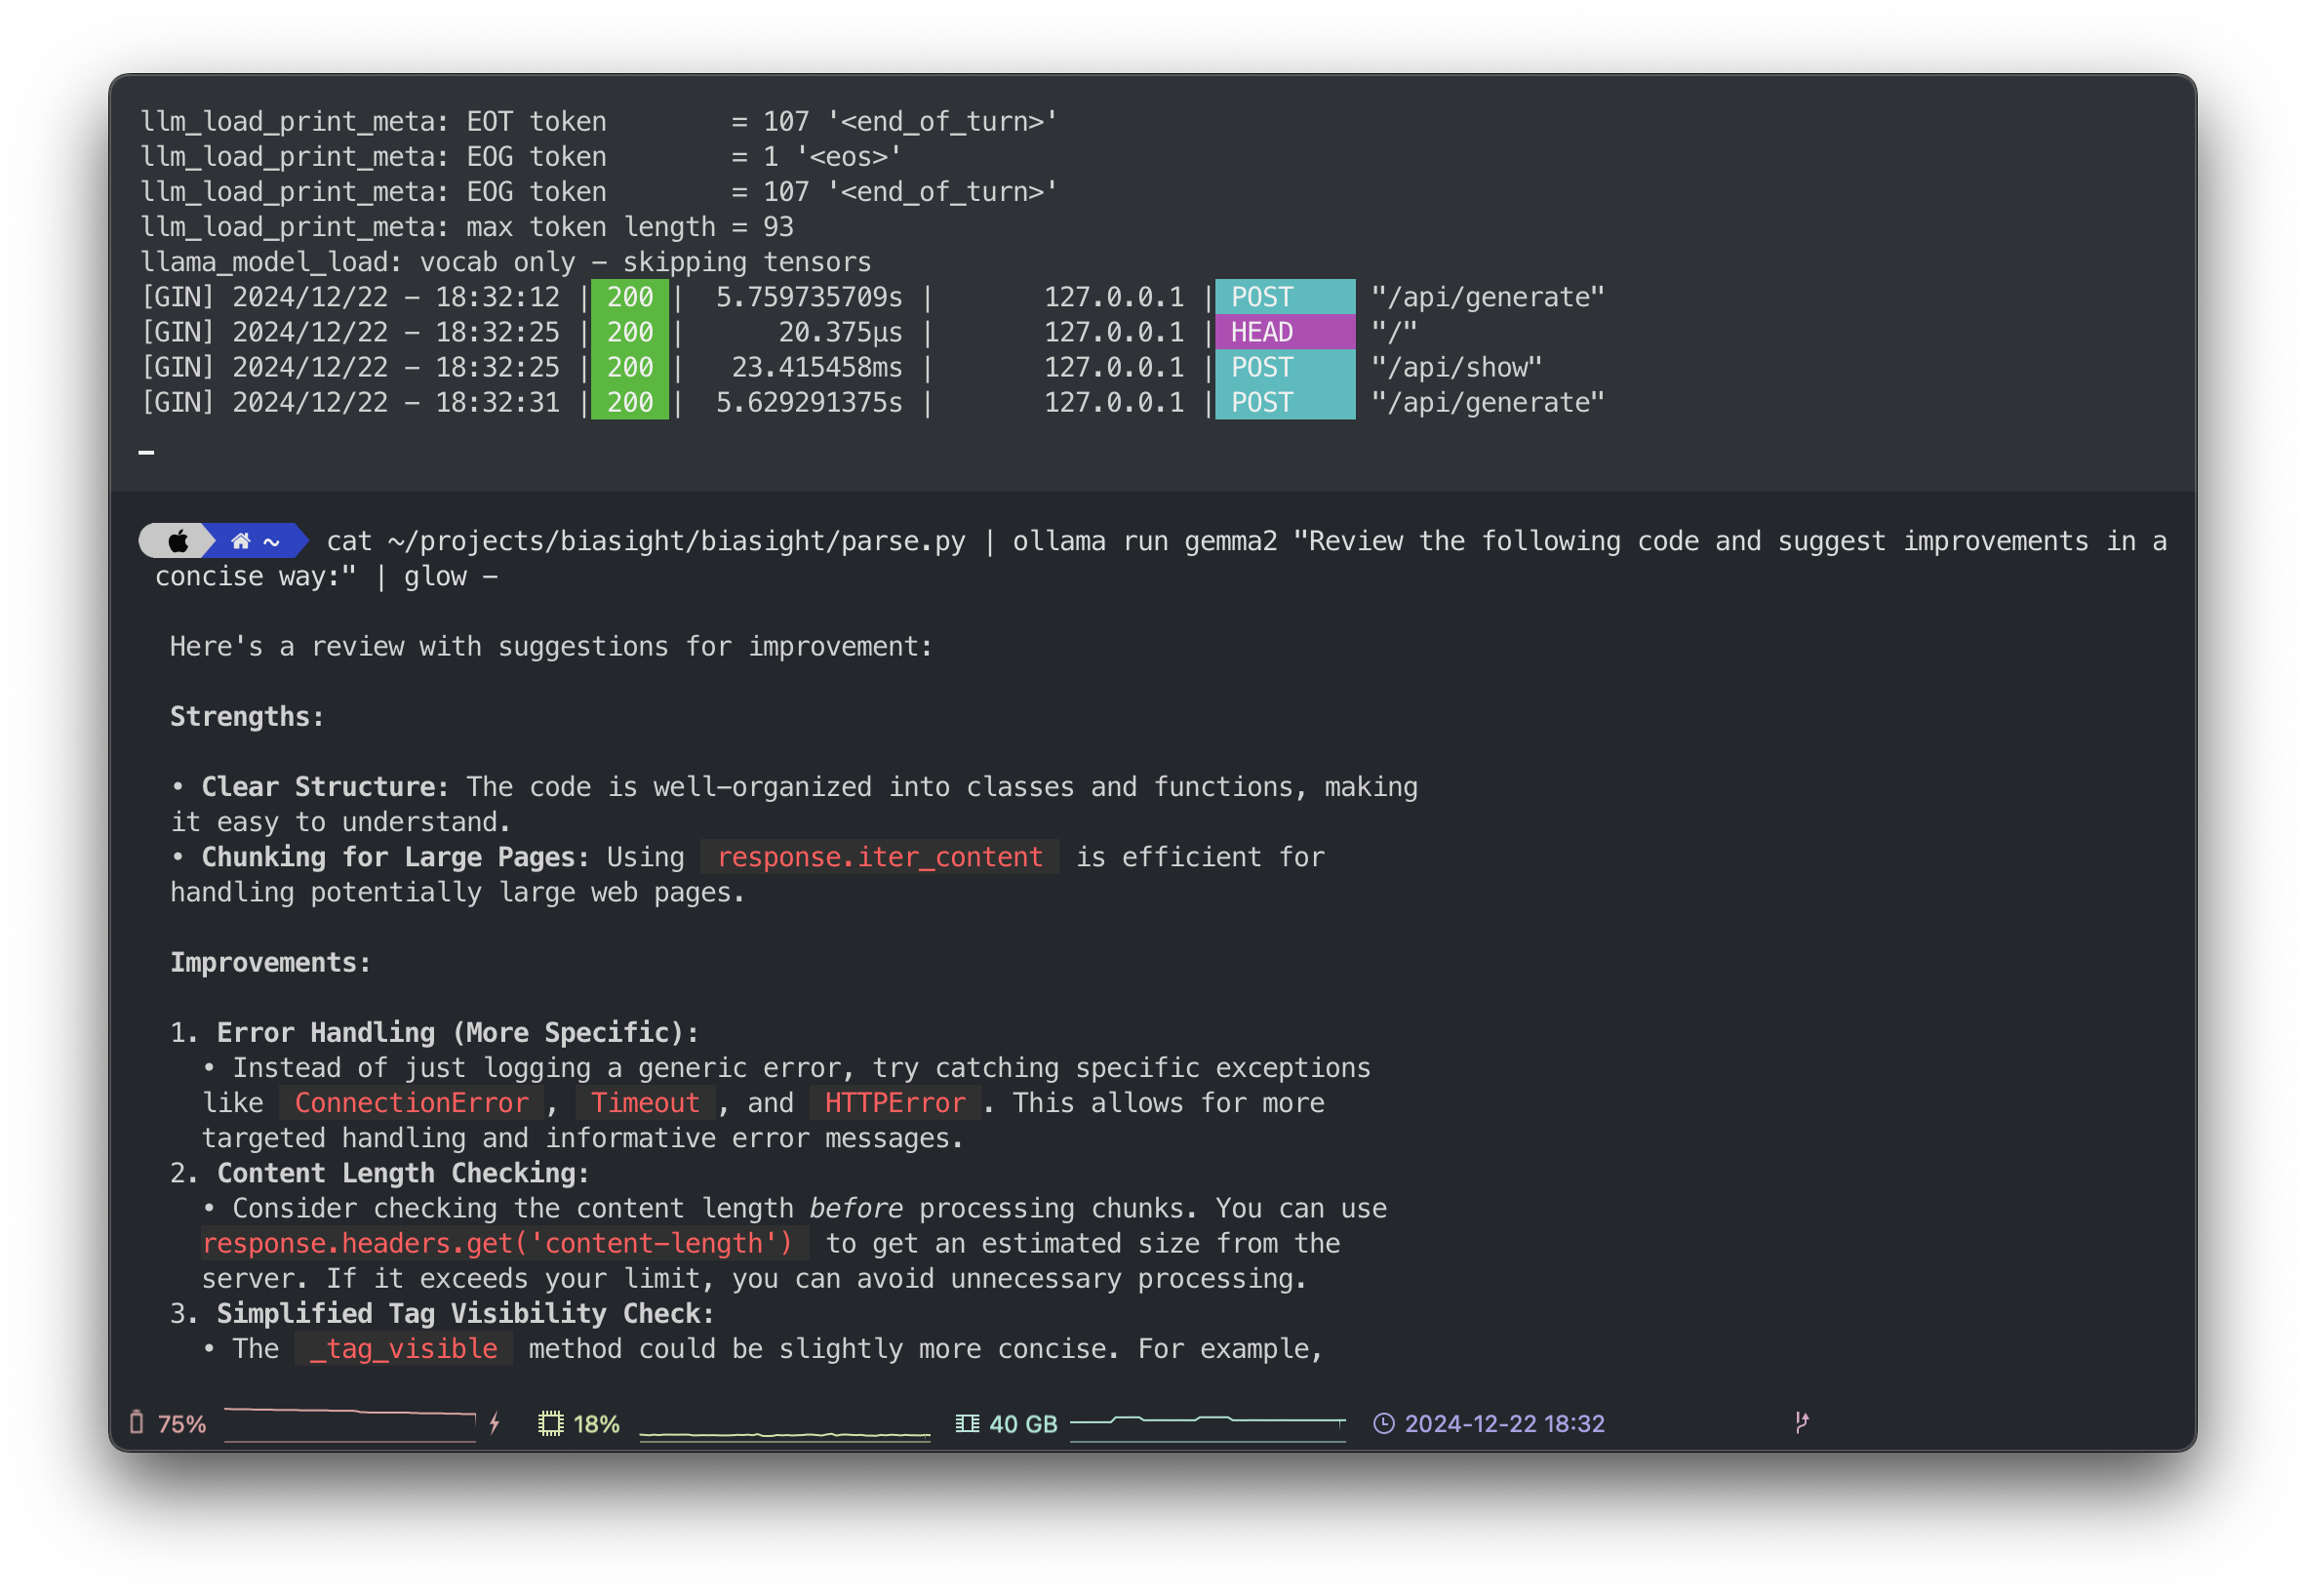 Ollama server and code review demo, source: by author
With glow, the code snippets suggested by the model have syntax highlighting, allowing you to receive quick feedback, even for internal, critical code, since it never leaves your laptop. You can review confidential code at no cost.
Of course, the quality of the review depends on the model you use. While Gemma 2 generally performs well, there are models specifically trained for code generation, such as CodeGemma, which is based on Gemma 2. Experimentation is essential; check out the Ollama model library for all available models.
We’ve all been there: it’s 11:42 PM, and buried in that 200-reply Slack thread lies information that could prevent tomorrow’s production incident. You might be unsure if there is confidential information, so you can’t simply copy and paste it into your favorite online LLM.
With the following snippet, you can copy any text, such as a long Slack thread, and use a local model to summarize it for you. Nothing leaves your local machine, and there are no complicated workflows involved—just copy and hit enter.
pbpaste | ollama run gemma2 "provide a concise and comprehensive summary of the given text:" | glow -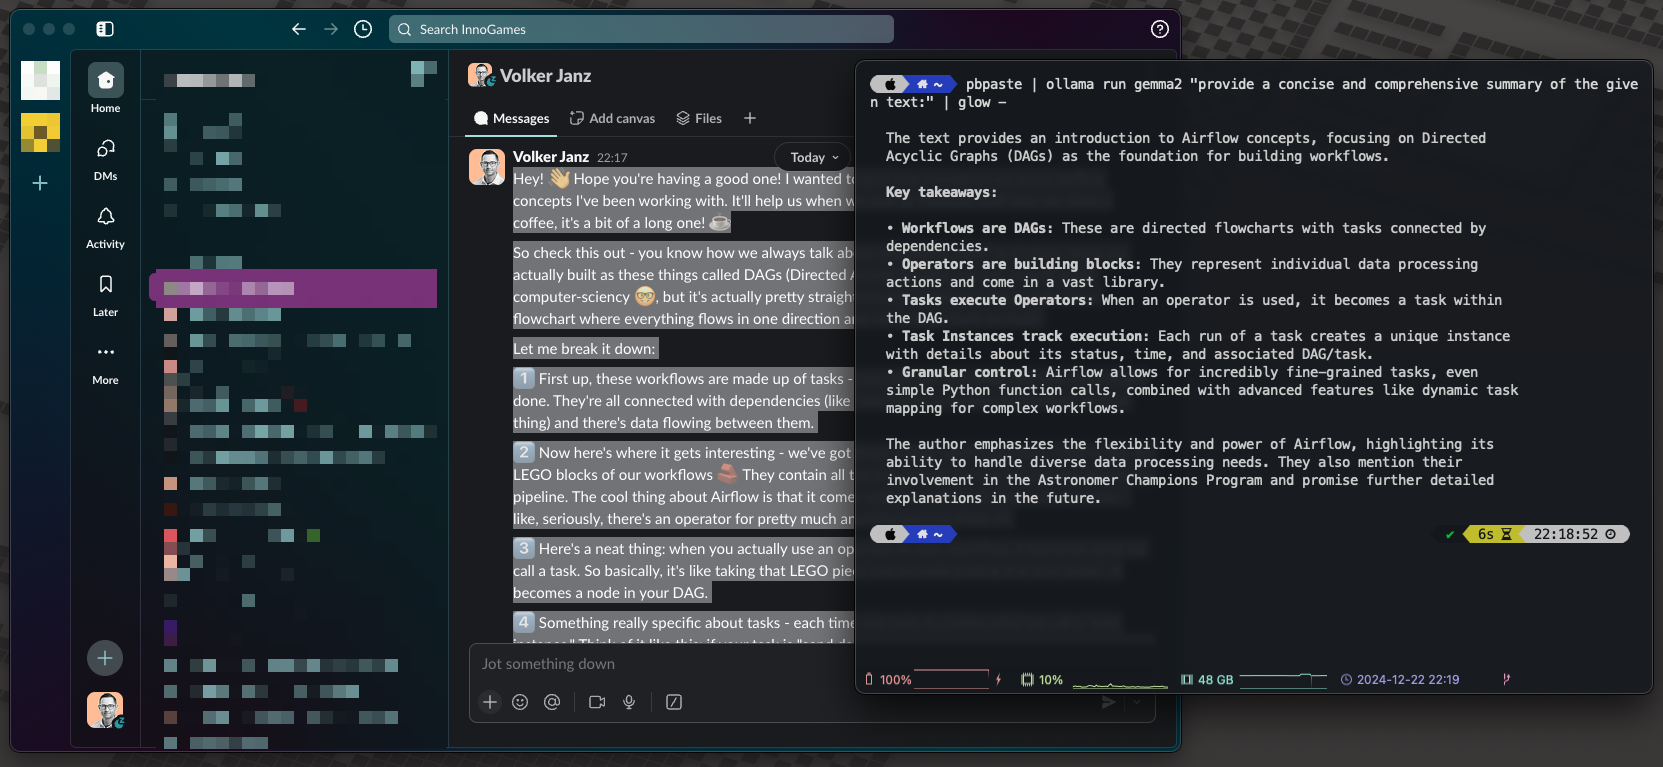 Summarize long Slack message with Ollama, source: by author
Honestly, I don’t use this snippet in that way because copying it to your terminal would overwrite your clipboard. First, you would need to paste the snippet, then copy the text to summarize, and finally press enter in your terminal. I value efficiency, and that process is not efficient. Instead, I use this snippet in a script that I have bound to a shortcut I run via Raycast. I will explain this later in the article, so keep reading; there are still things to learn about improving productivity.
In its simplest form, a mind map is a collection of ideas presented as a visual diagram. It starts with a central idea or topic in the middle, from which branches radiate, containing further themes and concepts to explore—typically represented by words, short phrases, and images. This structure gives mind maps a natural organizational flow.
A mind map organizes information in a way that mirrors how the brain functions—radiantly rather than linearly. It literally ‘maps’ out your thoughts, using associations, connections, and triggers to stimulate further ideas. This approach makes it easier to understand complex information.
I really enjoy learning through mind maps. Transforming complex articles, books, and documents into mind maps makes them easier to digest and serves as a great reference for later.
With the following snippet, we combine local AI with markmap, a project that allows you to transform regular Markdown into a mind map. Since LLMs excel at summarizing and creating Markdown, we just need to add some special ingredients to our prompt.
Using this snippet, you can select and copy any complex article, message, or text and transform it into a mind map! The mind map code is automatically copied to your clipboard via pbcopy. Then, simply paste it at https://markmap.js.org/repl and watch the magic happen. They also offer several integrations, including Obsidian and VSCode.
pbpaste | ollama run gemma2 "You are a specialized mind map generator that creates markmap-compatible markdown output. Your task is to analyze the provided text and create a hierarchical mind map structure using markdown syntax.

Rules for generating the mind map:
1. Use markdown headings (##, ###, etc.) for main topics and subtopics
2. Use bullet points (-) for listing details under topics
3. Maintain a clear hierarchical structure from general to specific
4. Keep entries concise and meaningful
5. Include all relevant information from the source text
6. Use proper markdown formatting for:
   - Links: [text](URL)
   - Emphasis: **bold**, *italic*
   - Code: \`inline code\` or code blocks with \`\`\`
   - Tables when needed
   - Lists (both bullet points and numbered lists where appropriate)
7. Always use proper emojis for main topics, if applicable you can also add them for subtopics

Example format:
## 📋 Project Overview
### Key Features
- Feature 1
- Feature 2

Generate a markmap-compatible mind map for this text:" | LC_ALL=en_US.UTF-8 pbcopy
To demonstrate the snippet, we are using an article by my highly respected fellow Data Engineer, Yaakov Bressler: Pydantic for Experts: Reusing & Importing Validators.
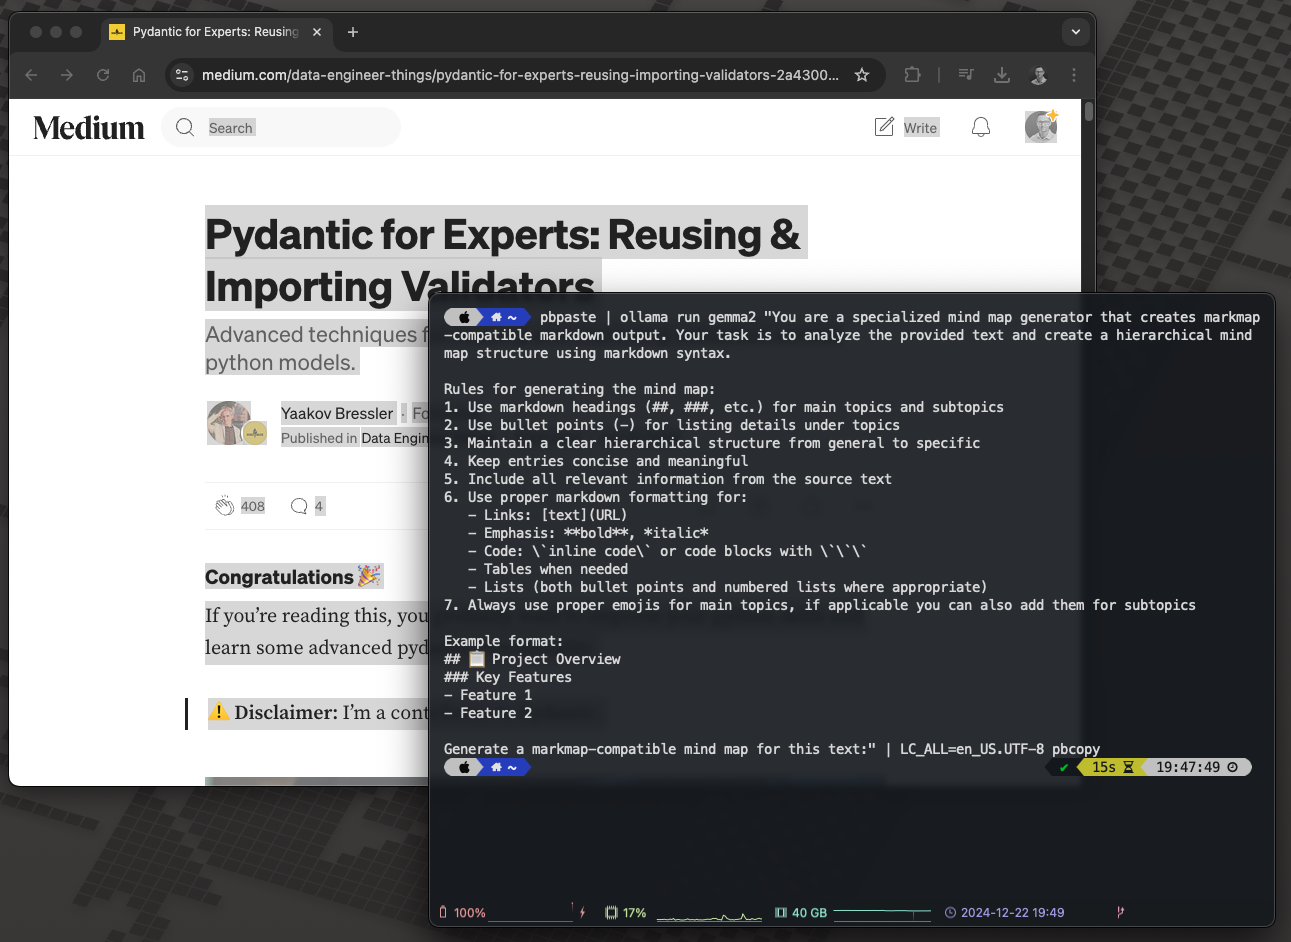 Generate markdown based mind map based on article, source: by author
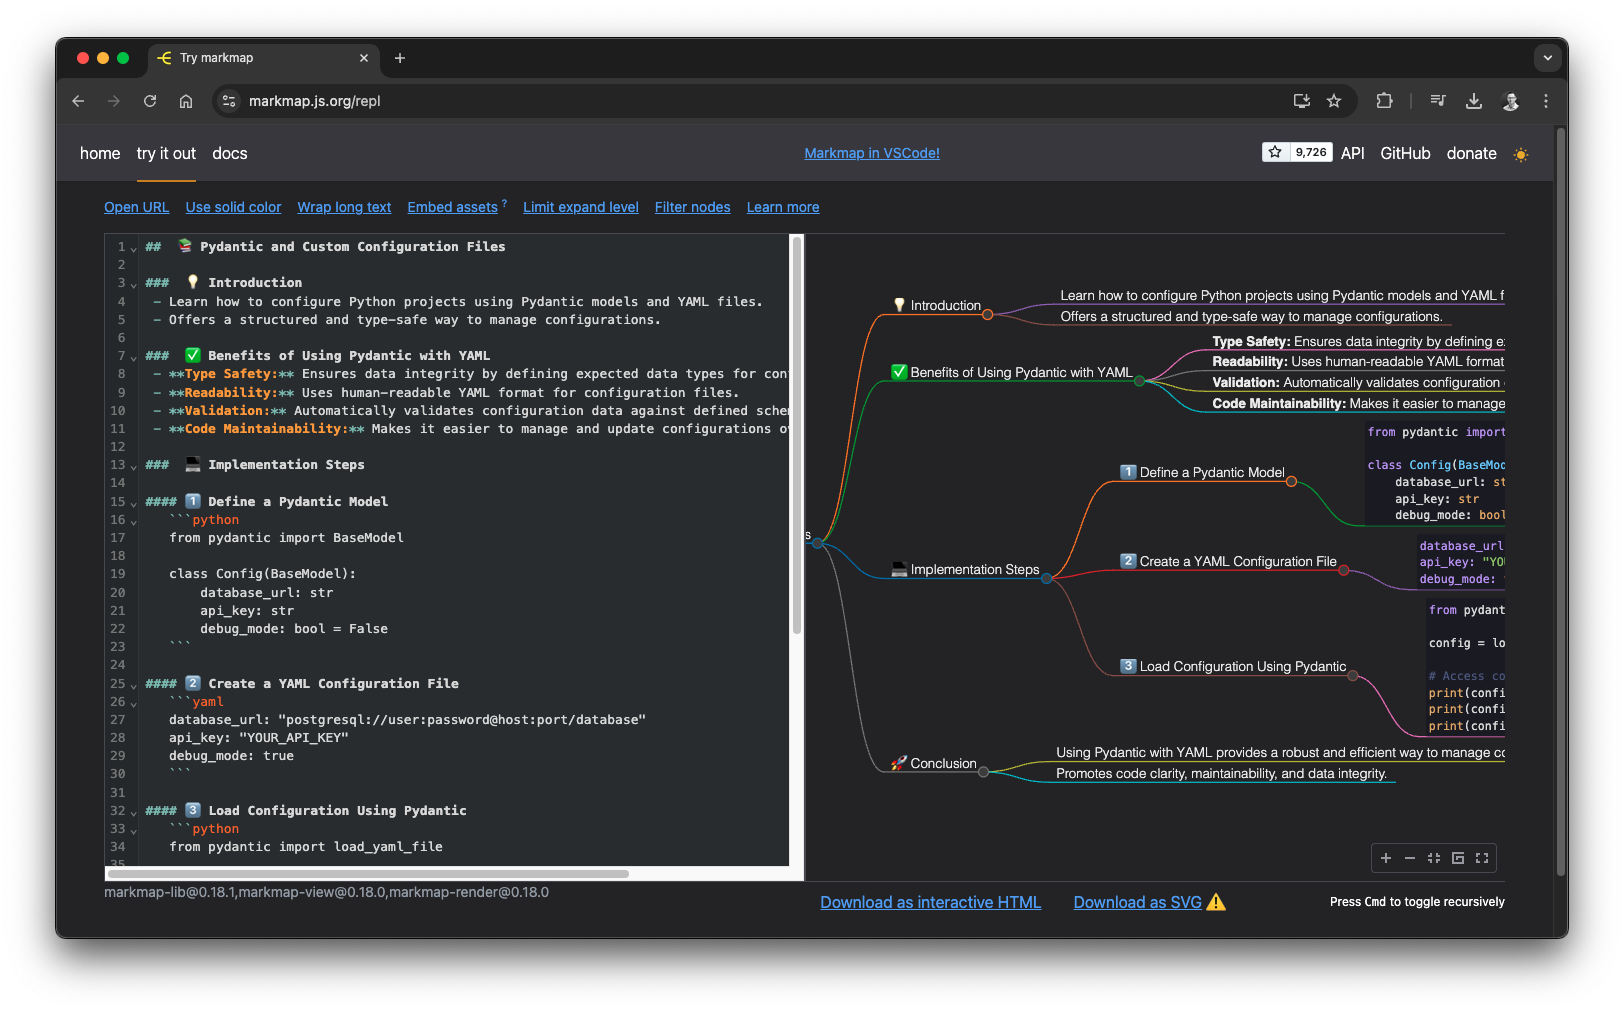 Mind map rendered with markmap, source: by author
And here is the result:
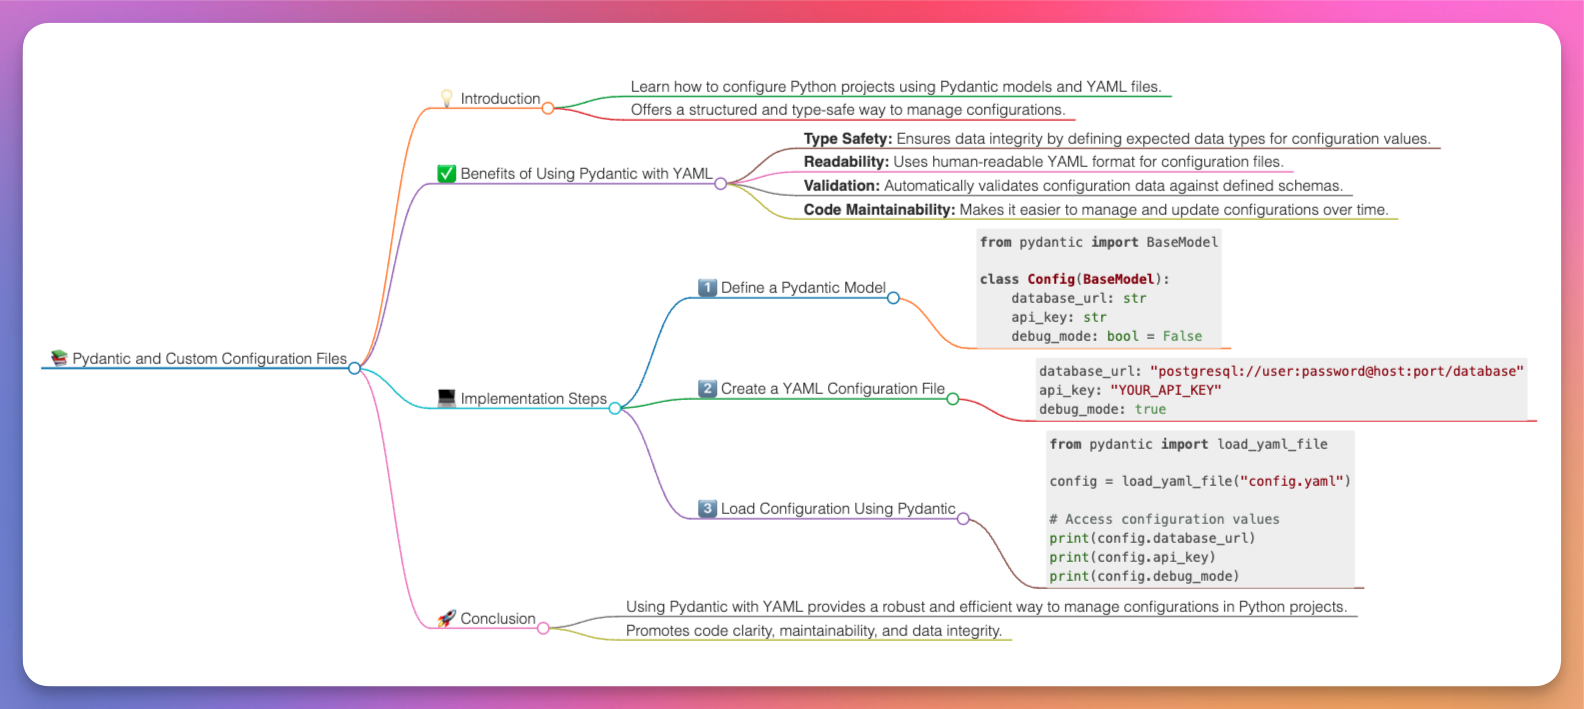 AI generated mind map, source: by author
If you imagine reading the article and having a mind map as a reference for later, your learning process can become significantly more effective, almost like a cheat.
Keep in mind that a significant reason mind maps are so helpful is that the creation process requires you to distill complex information into a few bullet points and connect them in a logical order. This creative process plays a crucial role in internalizing and learning the information, such as from a great article like the on from Yaakov. This benefit is completely lost when an AI generates the content for you. Personally, I find these AI generated mind maps most useful as a reference tool. I create them after exploring an article or documentation to have a cheat sheet that triggers my memory later. Learning is an individual process, so find what works best for you. However, do not overlook AI; it can significantly enhance your learning productivity.
Moreover, since everything runs locally, you can use this to create mind maps of confidential or internal information, such as project documentation or concepts.
This is just a short additional demo, to showcase that you can have multimodal AI locally. This could be useful in letting an AI helping you organizing your photos, without the need to upload them somewhere, keep everything local. If you have a model that supports it, you can simply add a path to an image on your local machine to your prompt, Ollama will take care of passing it to the model.
I recommend using a fully qualified path for the image. I often encountered issues when using a relative path. Ollama won’t complain if the image is not found; it will simply generate something else, which can be quite frustrating. When you use this method, make sure to check for the output Added image … to confirm that it is actually using the image file.
Let’s analyze a funny cat picture:
 Photo by Ernesto Carrazana on Unsplash
ollama run llava "Describe this image ./funny-cat.jpg" | glow -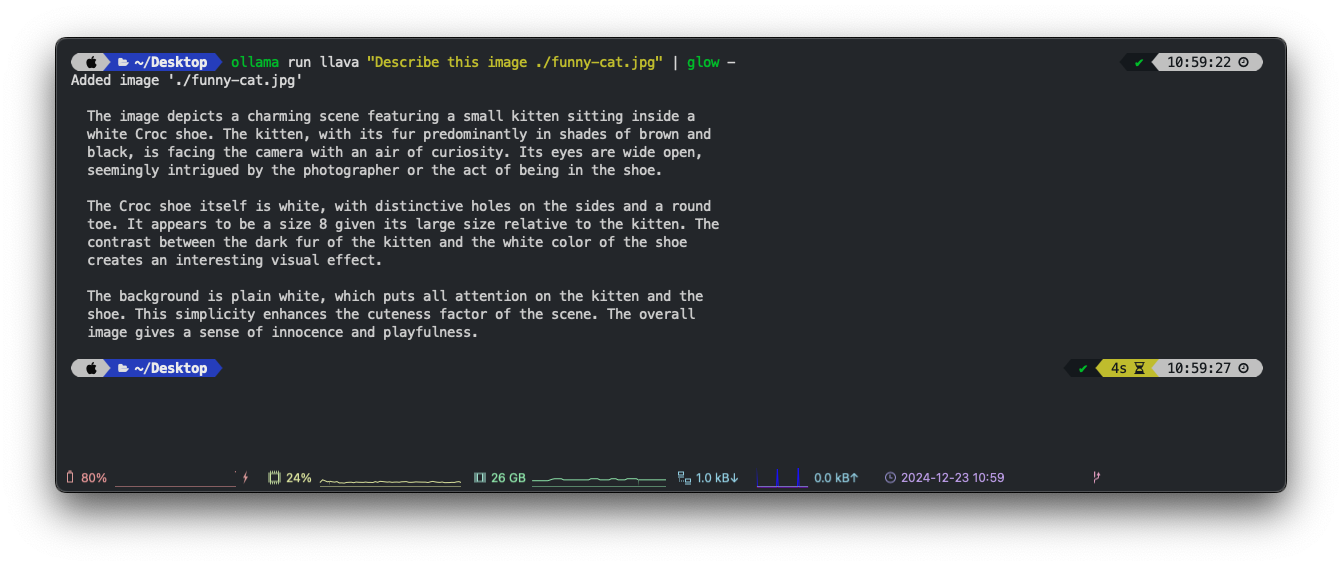 Local AI driven image summary, source: by author
I found this particularly useful with structured output. Since December 2024, Ollama has supported structured output. This feature allows you to write a script to analyze images and ensure that the LLM consistently returns a properly structured object. For example, you can identify main colors, objects, or the type of an image. This capability enables the creation of a helpful AI application for managing your images. However, a local model may have performance limitations. Despite this, it can still be an enjoyable learning project.
As mentioned earlier, copying and pasting these snippets may not be the most efficient workflow. In this article, we aim for greater efficiency. So, how about creating some Bash scripts to serve as daily AI helpers?
We will use the summary demo as an example, but you can easily adapt this to other snippets as well.
First, create a folder for scripts in your home directory:
mkdir ~/binNext, create a file for your script and ensure it is executable:
touch ~/bin/ai-summarize
chmod +x ~/bin/ai-summarize
Open it with your favorite editor:
vim ~/bin/ai-summarizeThen, add the snippet as a Bash script:
#!/bin/bash

MODEL=gemma2

echo "Summarizing clipboard content..."
pbpaste | ollama run ${MODEL} "provide a concise and comprehensive summary of the given text:" | glow -
Finally, add the script folder to your path. Adjust your home path and add the following line to your ~/.zshrc:
export PATH="$PATH:/Users/vojay/bin"Now, if you open a new terminal session or reload the config, you will have a new command that you can execute from anywhere.
You can now copy any text, type ai-summarize in the terminal, and receive a concise summary.
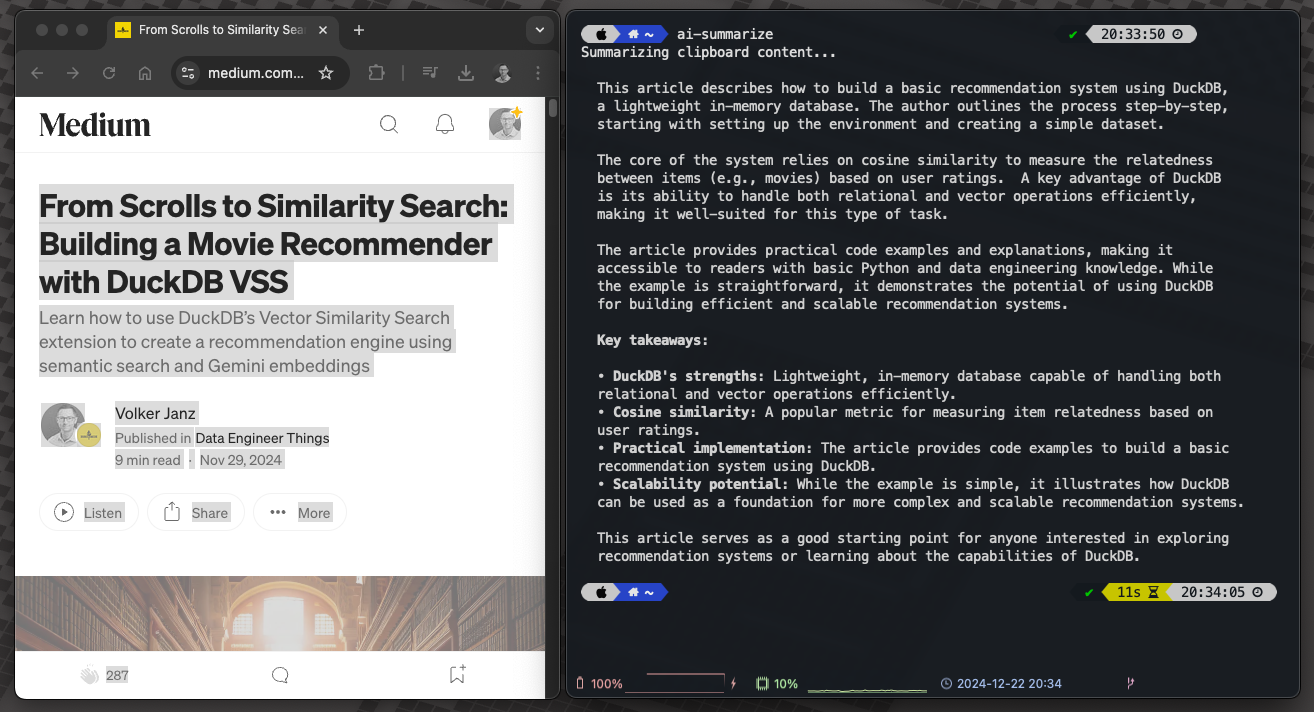 Use helper script to run local AI tasks, source: by author
Think of Raycast as Spotlight on steroids – it’s a Mac launcher that does much more than just find files. From managing your calendar to controlling Spotify, everything via the minimalistic launcher.
While Raycast offers AI features in their Pro plan, we can utilize our local AI setup with their free script commands feature. Who needs a subscription when you have Ollama running locally? 😉 On a more serious note, I believe the Raycast project is amazing. The Pro features are excellent, and the team deserves our support, so I personally opted for it. It’s well worth the price!
The magic happens through Raycast’s script commands. You can create custom scripts that Raycast can execute, and they can be written in various languages including Bash. Let’s integrate our AI helper scripts with Raycast:
~/bin)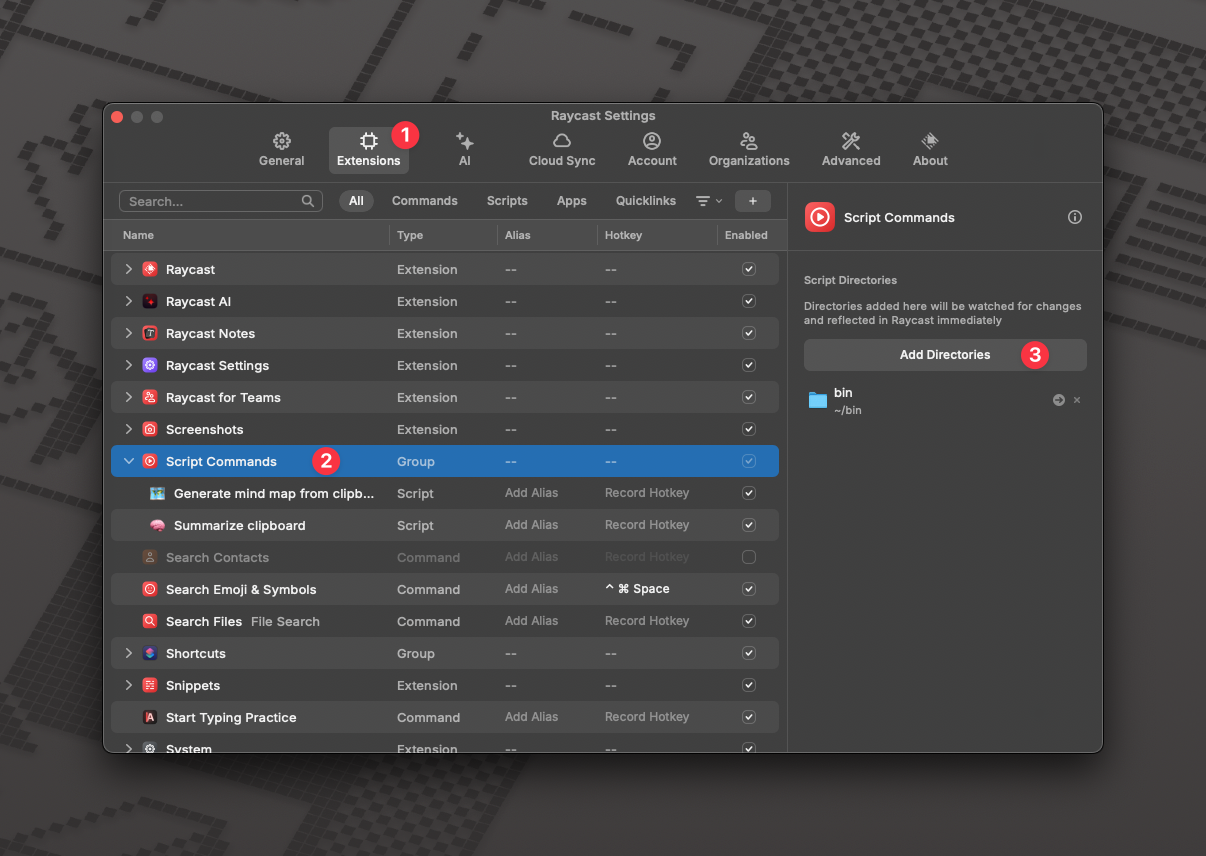 asdf
asdf
Now you can trigger your AI workflows directly through Raycast. For example:
Pro tip: You can assign custom hotkeys to your most-used AI commands. I use cmd+shift+m for summarize and cmd+shift+m for creating mind maps.
This combination of local AI and Raycast creates a powerful, private, and free productivity system. No need to open browser tabs, no data leaving your machine, and no subscription required. Just pure, keyboard-driven efficiency.
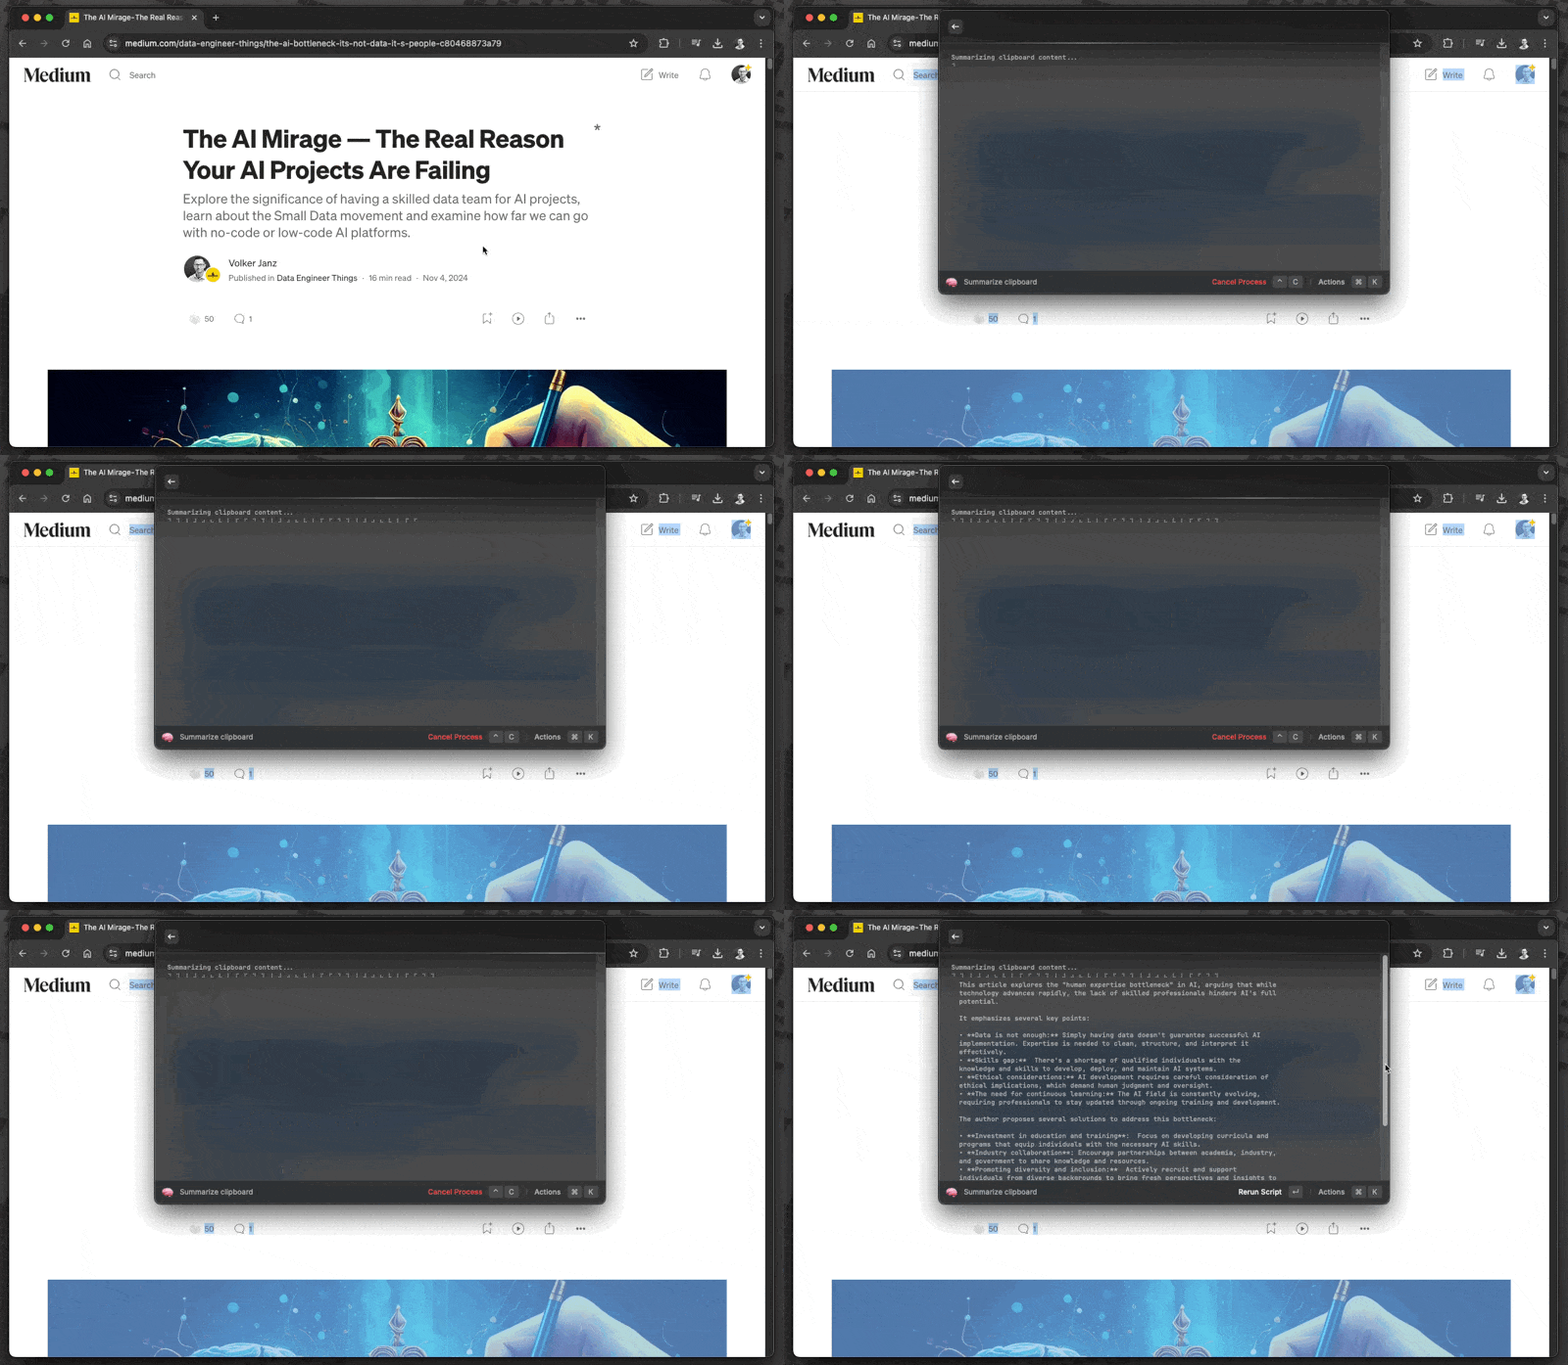 Raycase demo, source: by author
This deserves its own article, but if you read up until this point, this is a really powerful next step to discover. Open WebUI is an extensible, feature-rich, and user-friendly self-hosted WebUI designed to operate entirely offline. It supports various LLM runners, including Ollama.
We can start Open WebUI using Docker. Before starting it, ensure your Ollama server is running with ollama serve.
docker run -d -p 3000:8080 -e WEBUI_AUTH=False -e OLLAMA_BASE_URL=http://host.docker.internal:11434 -v open-webui:/app/backend/data --name open-webui ghcr.io/open-webui/open-webui:mainHere’s a breakdown of what happens:
--rm: Keeps things tidy by automatically removing the container when it stops.-d: Runs in “detached” mode (in the background), so you can keep using your terminal.-p 3000:8080: Maps port 3000 on your Mac to port 8080 in the container (this is how you’ll access the UI).-e WEBUI_AUTH=False: Disables authentication in Open WebUI, great for local usage but be careful with this in production!-e OLLAMA_BASE_URL=http://host.docker.internal:11434: The magic sauce that connects Open WebUI from within Docker to your Ollama server on Mac.-v open-webui:/app/backend/data: Creates a volume to save your chats and settings.--name open-webui: Gives our container a friendly name.ghcr.io/open-webui/open-webui:main: The latest version of Open WebUI from GitHub.Pro tip: host.docker.internal is a special Docker Desktop for Mac feature that allows containers to communicate with services running on your Mac. It’s like giving your Docker container a secret passage to your local Ollama server!
After running this command, your own personal AI chat, with plenty of advanced features, all running local and for free is available at: http://localhost:8080/. You can choose from all models which you have pulled via Ollama on the top left.
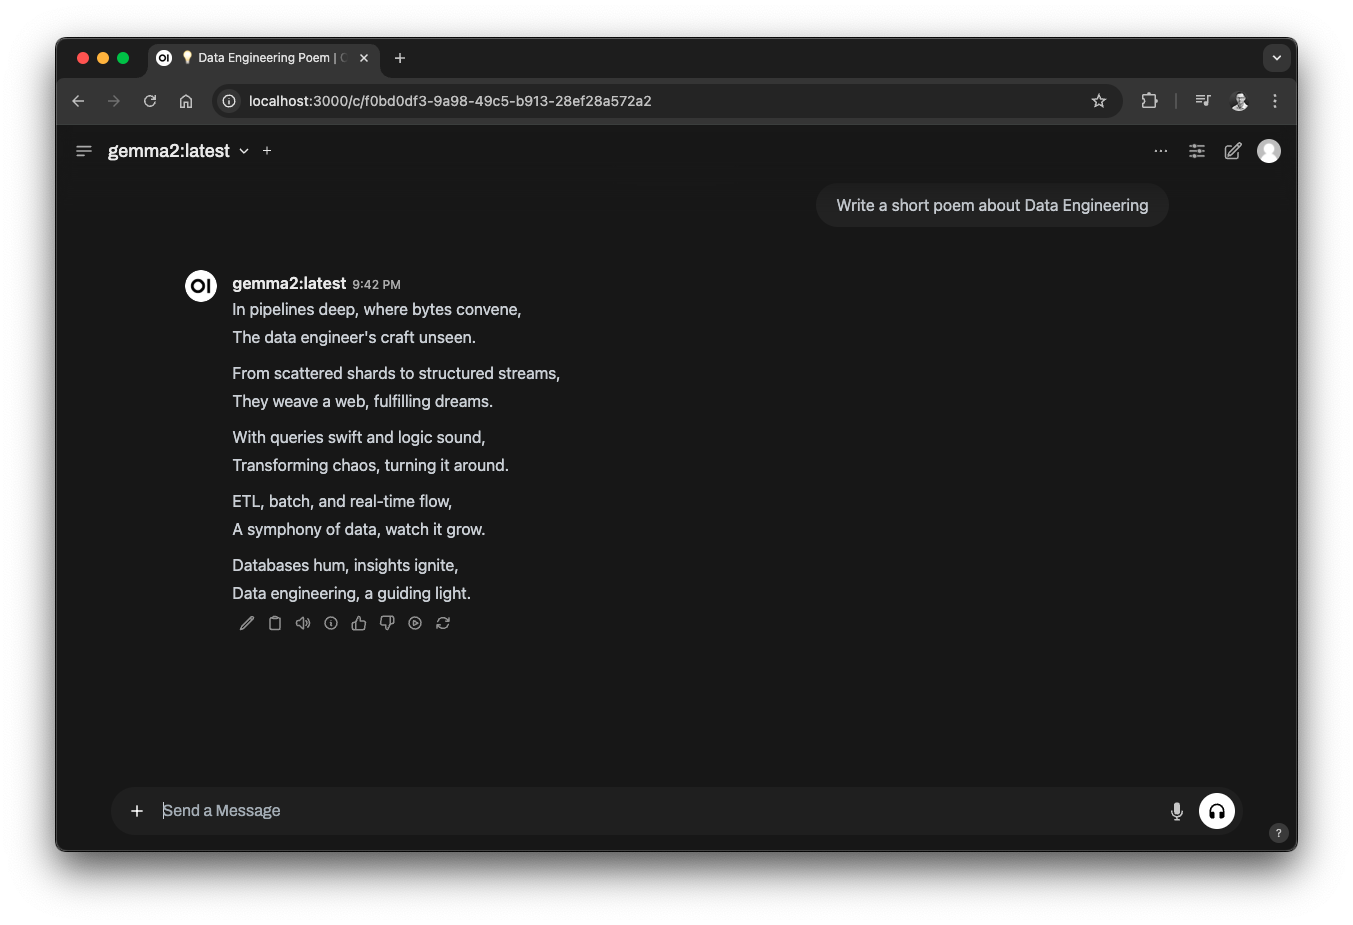 Open WebUI to have your own, local AI chat, source: by author
If you want to avoid the hassle of setting up Open WebUI and you’re using macOS, consider the excellent, pragmatic alternative called Enchanted. This open-source tool is compatible with Ollama. You can download it directly from the App Store, making it a great option for a lightweight start.
Remember that 6:00 AM scenario? The overwhelming flood of information, the long Slack messages, and the desperate need for that first coffee? Well, it’s time to write a different ending to that story.
And yes, you should still get your coffee first. Some things even AI can’t replace!
Through this journey, we’ve discovered how local AI can transform our daily workflows. From instant code reviews to magical mind maps, from summarizing essays to analyzing images – all while keeping our sensitive data secure and under our control.
But perhaps the most exciting part isn’t just what these tools can do – it’s what YOU can do with them. Those little helper scripts we created? They’re just the beginning. Every time you find yourself performing a repetitive task, remember: there might be a local AI solution waiting to be crafted.
I started with simple scripts, but soon found myself building an entire ecosystem of AI-powered tools. It’s like having a super-powered command line that actually understands what you need.
So, what’s next? Well, that’s up to you. The tools are in your hands, the models are on your machine, and the possibilities are endless. Maybe you’ll create that perfect workflow that saves your team hours each week. Or perhaps you’ll build something entirely new that we haven’t even thought of yet.
Now, if you’ll excuse me, I have some Slack essays to write… but don’t worry, my colleagues have the tools to handle them now! 😉
Final note: How are YOU planning to use local AI in your workflow? Have these demos inspired you to create your own productivity hacks? Share your ideas and experiments in the comments below – I’d love to see how you’re transforming your daily tasks with local AI! And if you’re already using Ollama in creative ways, share it with the world. After all, the best productivity tips often come from the community.
Some updates based on the feedback and discussions regarding this article
